Subject
Applies to: Admin
Purpose: Creating Distribution Rules
Location in Ricochet: Configuration > Distribution & Tags
Description
The instructions in this article require Administrator permission
These instructions explain how to create a Distribution Rule in Ricochet, which automatically tags leads based on specified criteria. The process involves naming the rule, selecting fields (like Vendor Name or lead fields), choosing operators (e.g., = or IN), and setting values to define the matching conditions. Multiple filters can be added to refine the rule. After defining the criteria, a tag is assigned—either existing or newly created—and can optionally be restricted to specific users. Once saved, the rule applies to new leads automatically, and can also be retroactively applied to existing leads using the “Tag all leads” option.
Resolution
Optional: View the interactive tutorial for this process:
Click here to open the step-by-step tutorial in a new tab
Non-Administrators do not have the access to follow these instructions and should open a ticket.1. To create a Distribution Rule, click Configuration

2. Click Distribution & Tags
3. Click Create Rule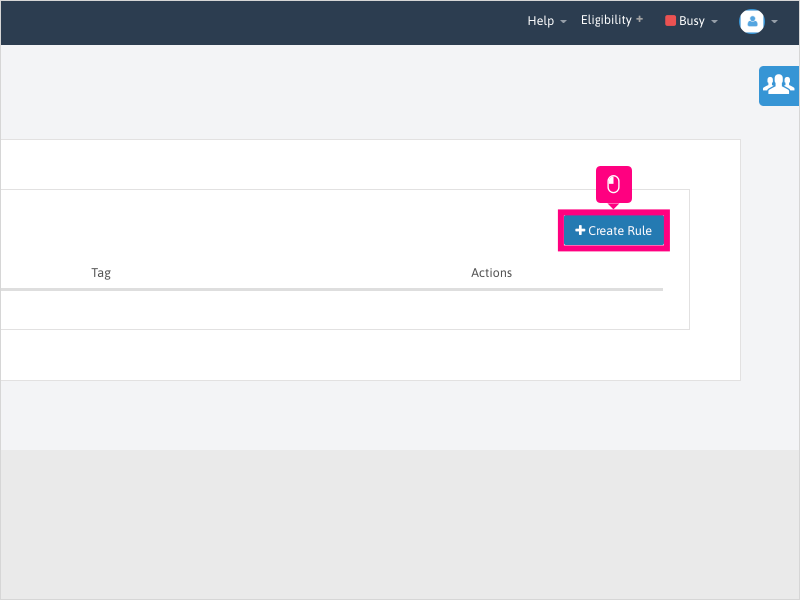
4. Click inside the Name Of Rule area and type the name you wish to give the Distribution Rule.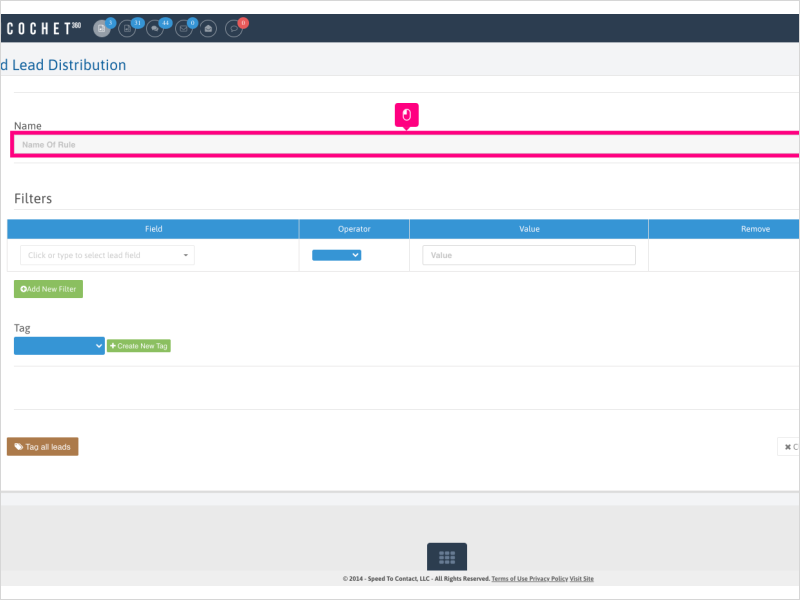
5. Under the "Field" column, click the dropdown and select the field from Ricochet.
Note: You can choose lead fields, Vendor Name field, or Campaign ID field (if you have Campaigns set up for your Vendors in Manage --> Vendors).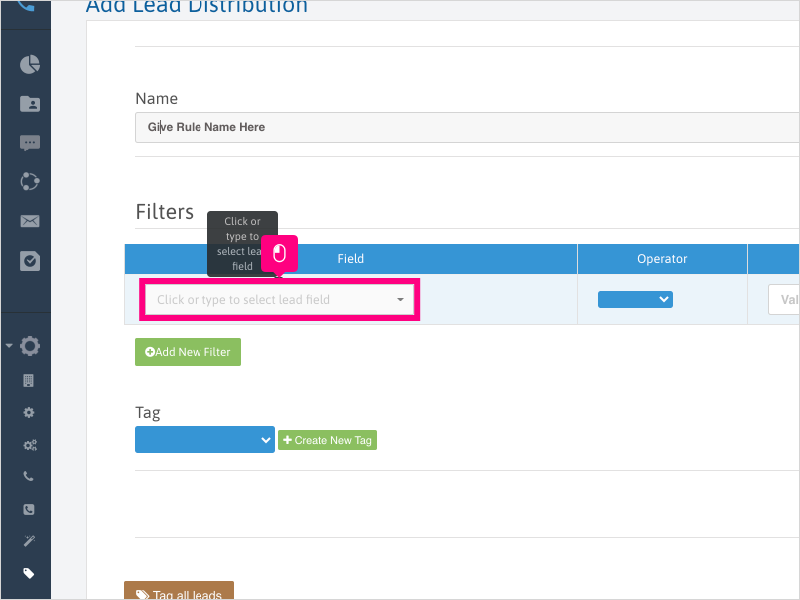
6. For this example, we will click Vendor Name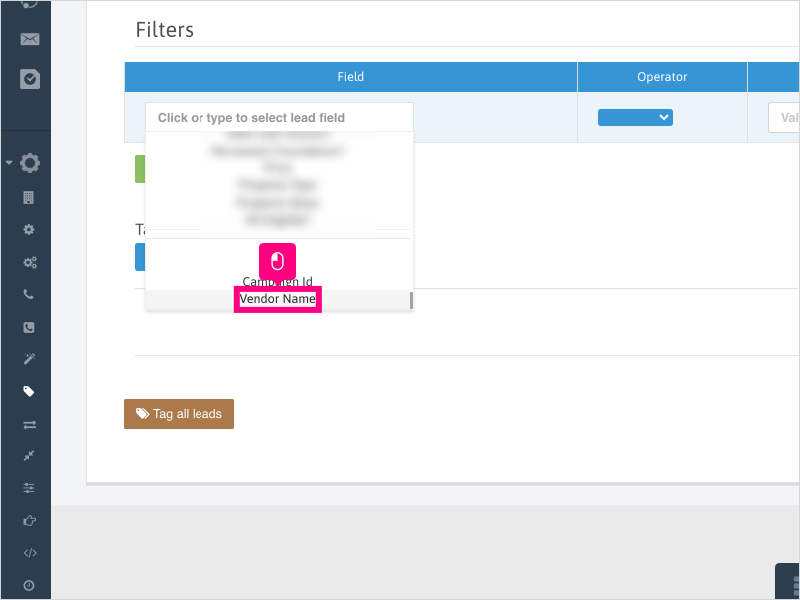
7. Under the Operator column, click the dropdown to reveal either the = or IN operator.
8. The = operator indicates that the vendor name can only equal the one selected.
The IN operator allows you to select more than 1 vendor name in the dropdown and can equal any of the selected.
For this example, we will select the IN operator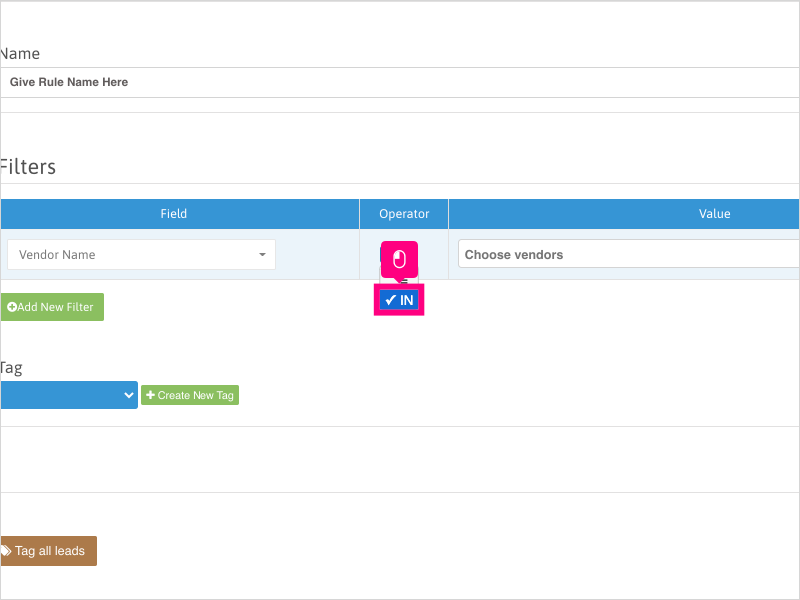
9. Under the Value column, click the "choose vendors" area to select your vendor or vendors.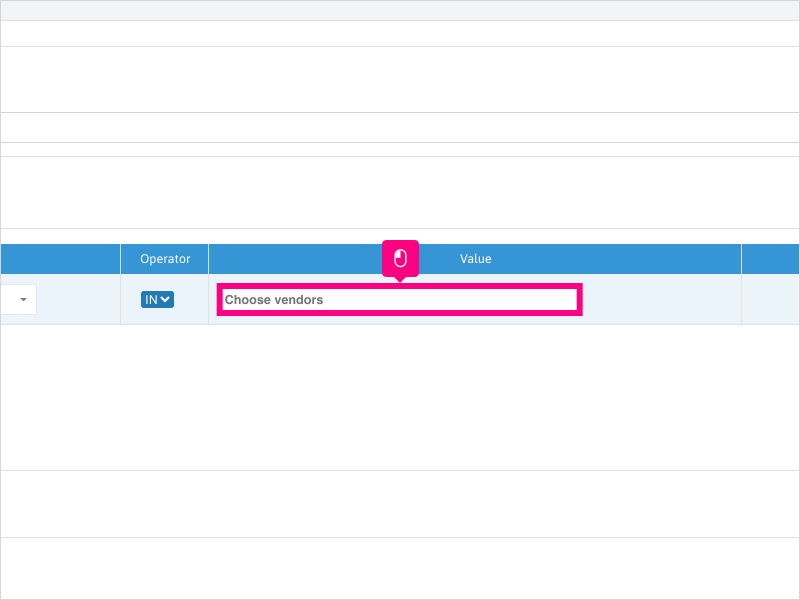
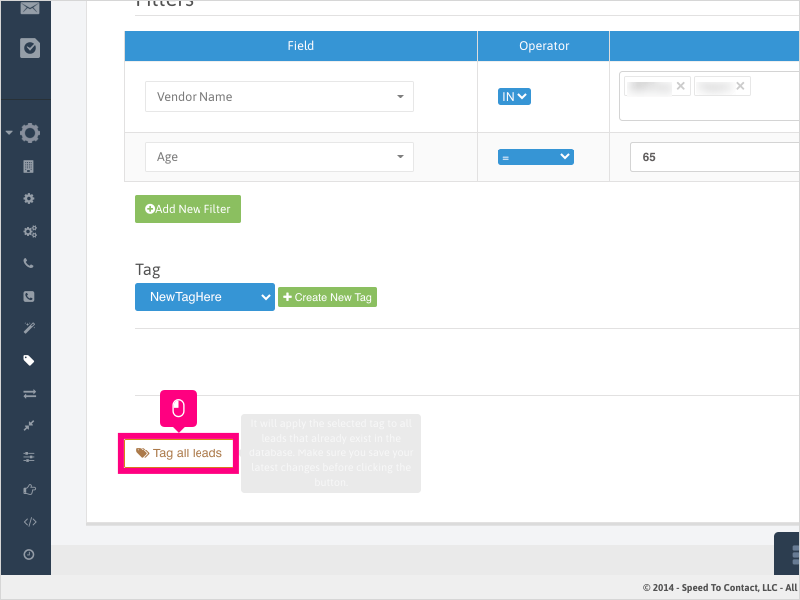
10. If you wish to add more filters, you can add more by clicking the Add New Filter button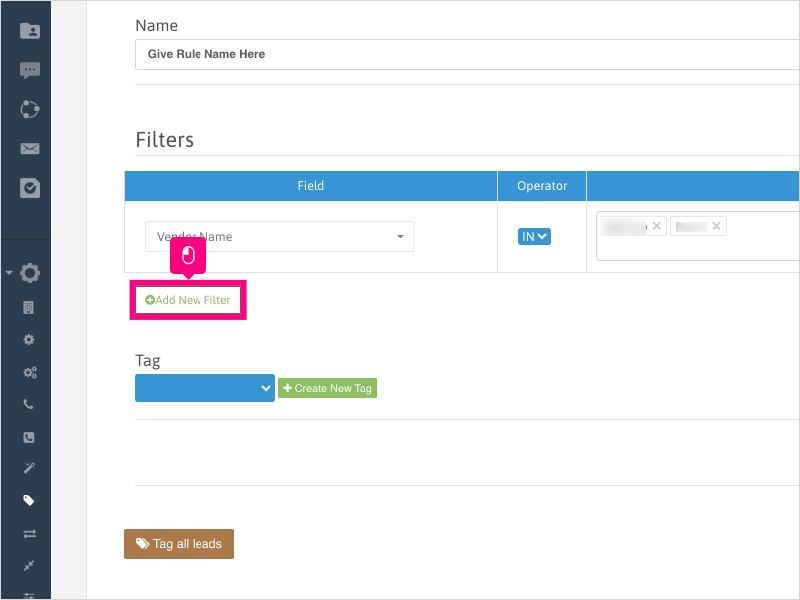
11. Click the dropdown to choose your field to add.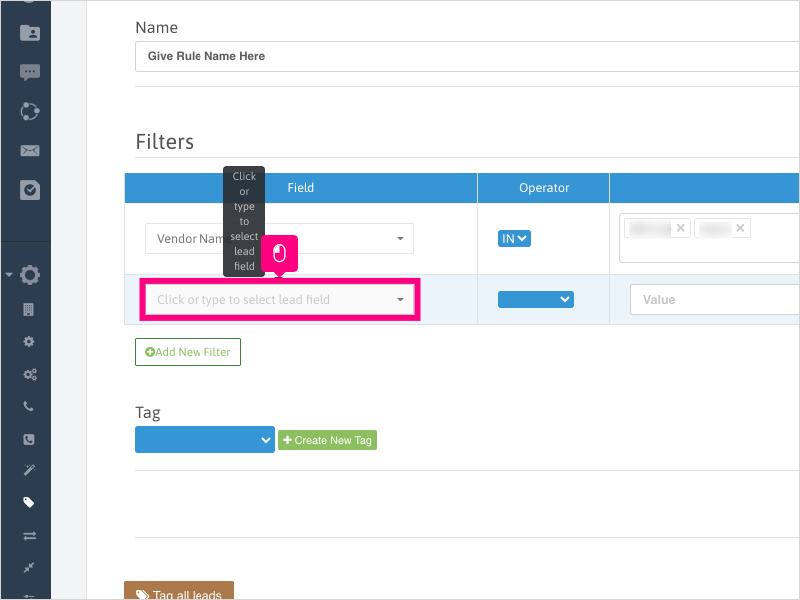
12. For this example, we will choose a field called Age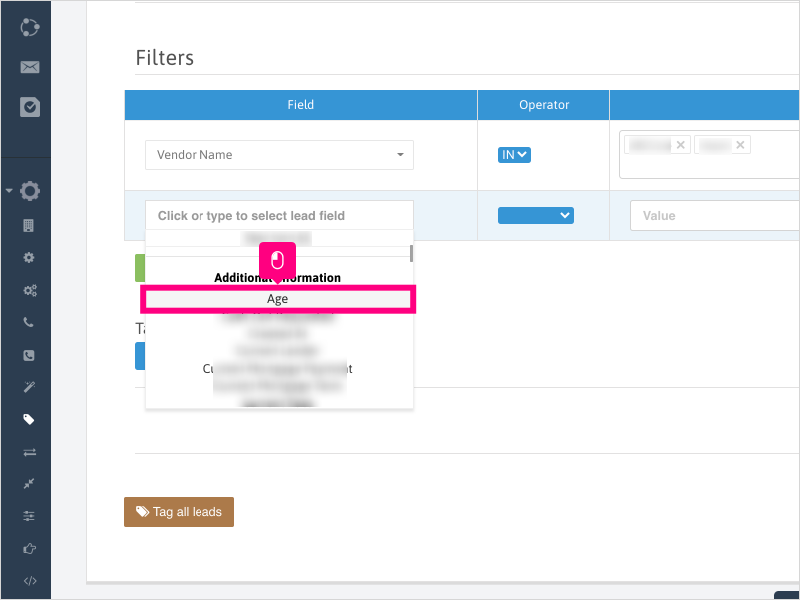
13. Click the operator dropdown.
NOTE: The options displayed will differ from the ones in the example above for Vendor.
14. The Operator options include:
Equal, Not Equal To, Greater Than, Less Than, BETWEEN, LIKE, IN, REGEX.
For this example, we will select =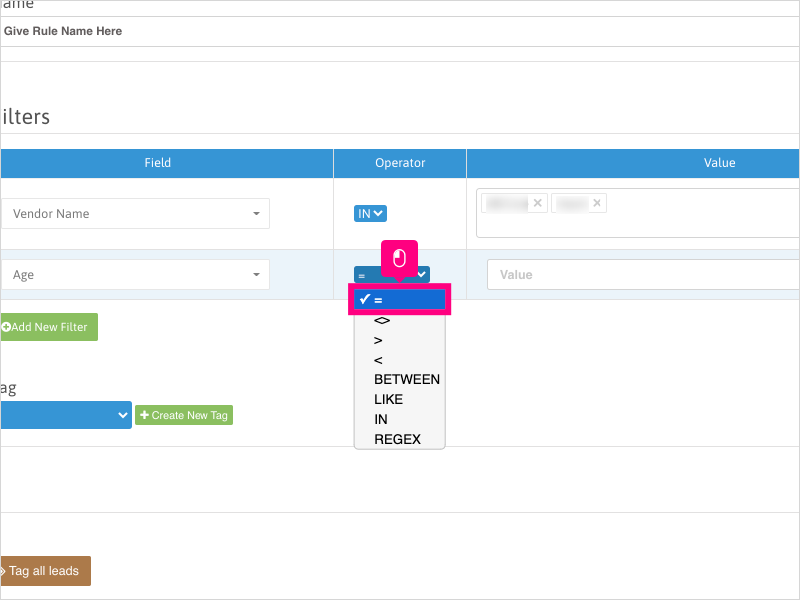
15. Click inside the Value area and type in the value.
When using the "Equal" Operator, the value must be 100% exact on the lead for the rule to consider it a match.
If using text, the spelling and capitalization must be exact as well.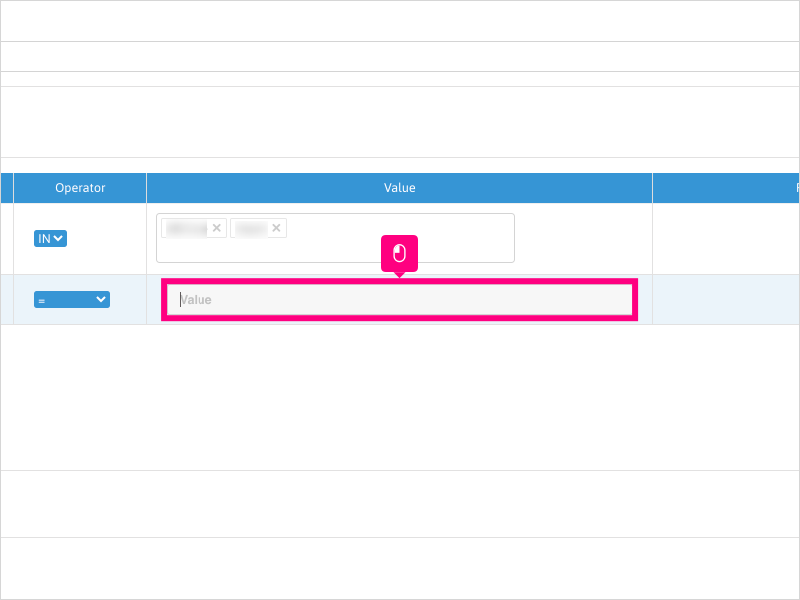
16. If you need to add more filters, follow steps 10 thru 15 - otherwise, once completed with adding filters for your Distribution Rule, next you'll need to create a tag for this rule.
You can select one that is already created from the dropdown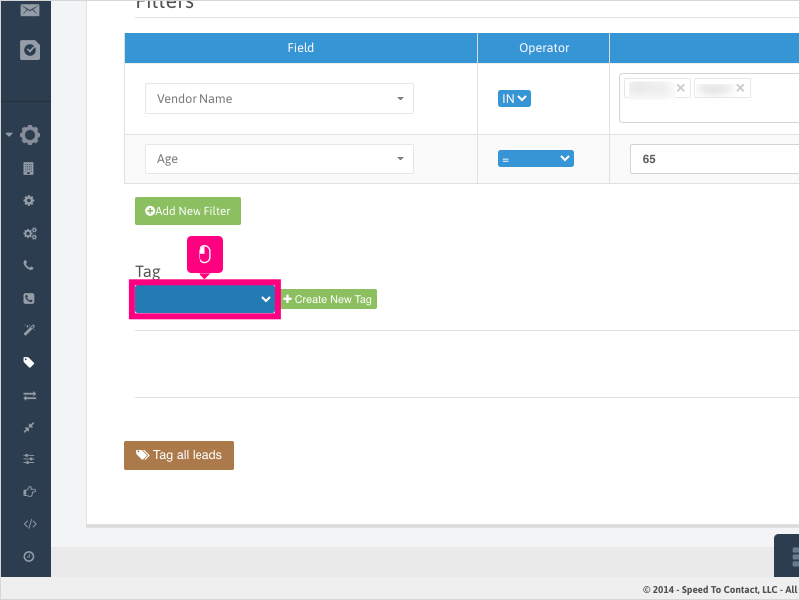
17. For this example, we will select Manually Created
18. Click Create New Tag if you do not have one already created, or selected the wrong one from the dropdown.
19. Click inside the Tag Name area and type the name of the tag you wish to create.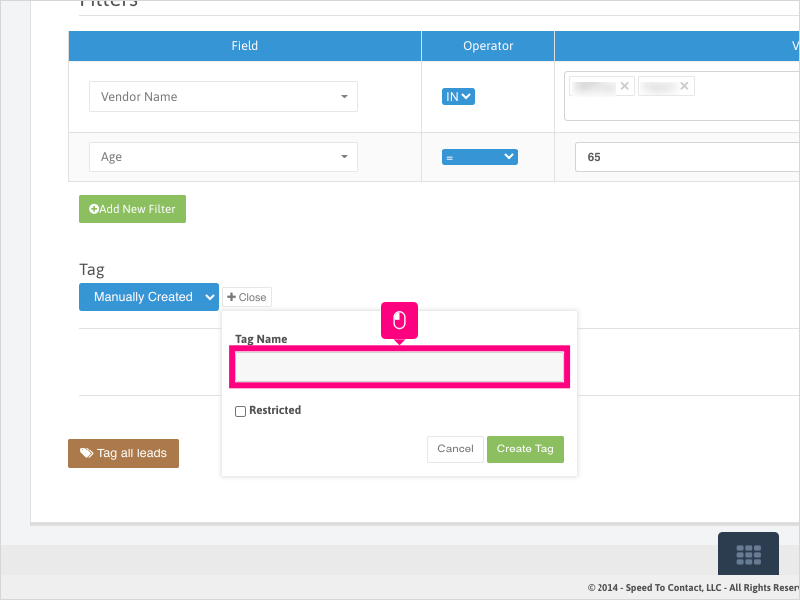
20. If you want to restrict this tag to certain users, click Restricted
21. Click inside the Search user area or scroll down and select the user or users you wish to restrict this tag to.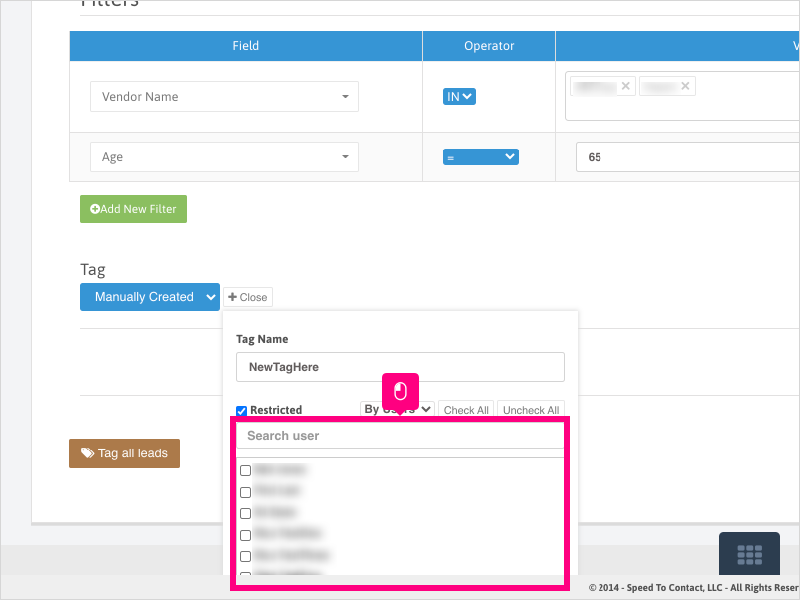
22. For this example we will not restrict this tag. To go back and not make the tag restricted, click the Restricted checkbox again.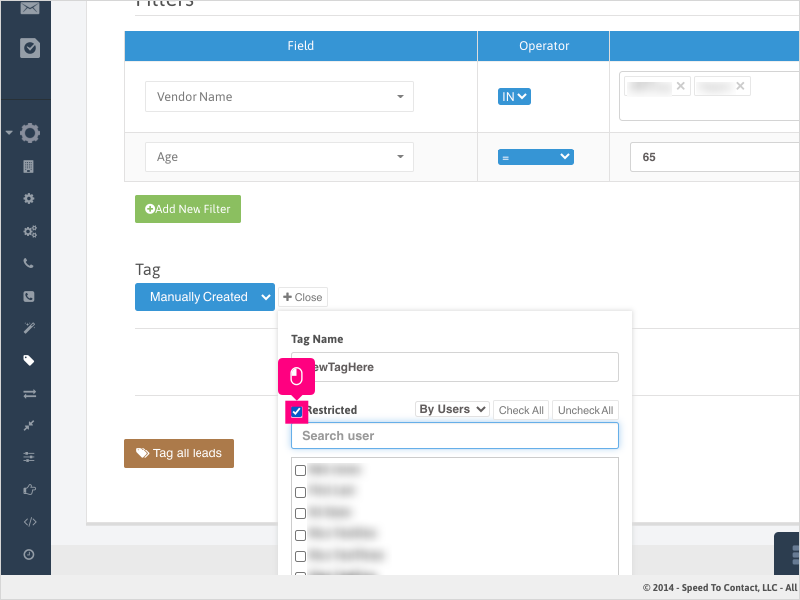
23. Once you have the name and restricted users (if applicable) chosen, click Create Tag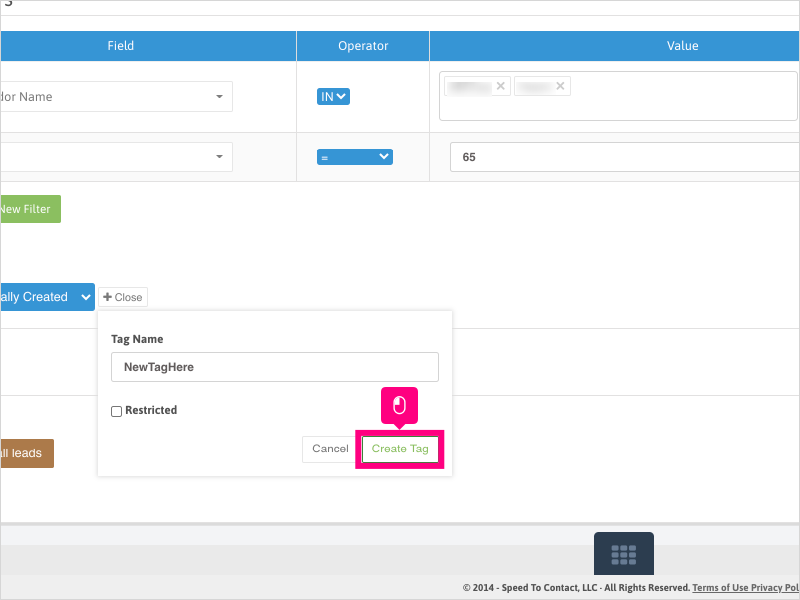
24. Click Save to create the rule.
25. If you want to apply this rule and tag to existing leads in Ricochet, once the Distribution Rule is saved, you can click Tag all leads button to run this rule against all leads in Ricochet.
The rule will also apply to new leads entering Ricochet.
Was this article helpful?
That’s Great!
Thank you for your feedback
Sorry! We couldn't be helpful
Thank you for your feedback
Feedback sent
We appreciate your effort and will try to fix the article