Subject
Applies to: Admin
Purpose: Creating Webhooks
Location in Ricochet: Configuration > Posts/Webhooks
Description
The instructions in this article require Administrator permission
These instructions explain how to create a webhook in Ricochet to send data to an external URL or application. The process includes naming the webhook, setting its destination URL, choosing where it can be triggered (e.g., Lead Popup, Transfer Window, or Lead Management Page), configuring delivery options (such as POST method and single-use triggers), and defining the data to send through URI parameters or the request body. Users can include static values or dynamic lead fields, add multiple parameters, set content types like JSON, and optionally include headers. Once saved, the webhook becomes available in the chosen locations for users to trigger.
Resolution
Optional: View the interactive tutorial for this process:
Click here to open the step-by-step tutorial in a new tab
Non-Administrators do not have the access to follow these instructions and should open a ticket.1. To create a webhook, click Configuration

2. Click Posts/Webhooks
3. Click Add Webhook
4. Click inside the Name Of Webhook area and give your webhook a name.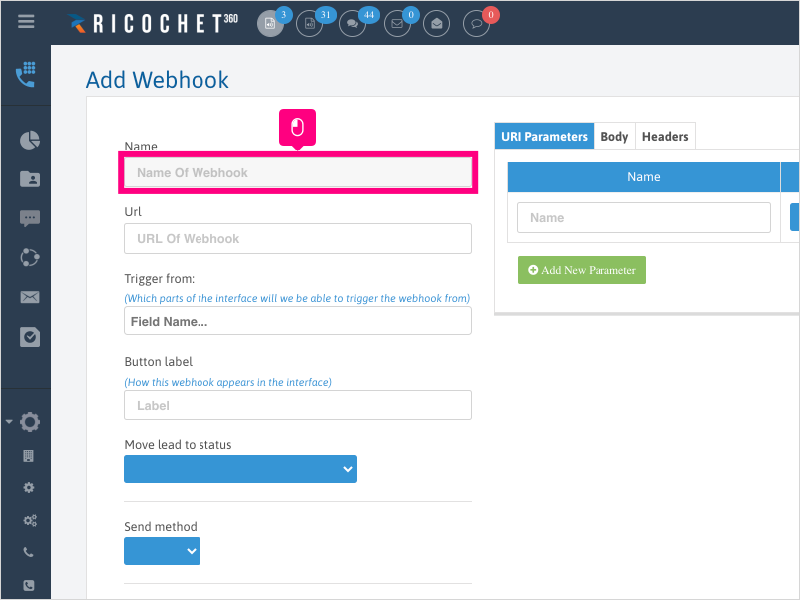
5. Click inside the URL Of Webhook area and type in the URL of the destination of your webhook.
NOTE: You may need to consult with your 3rd party application docs on the proper URL to enter. For this example, we are using a simple site like Google.
6. Click the Field Name box to select where to trigger the webhook from.
7. Click Lead popup if you want to display the webhook button on the Lead Popup window.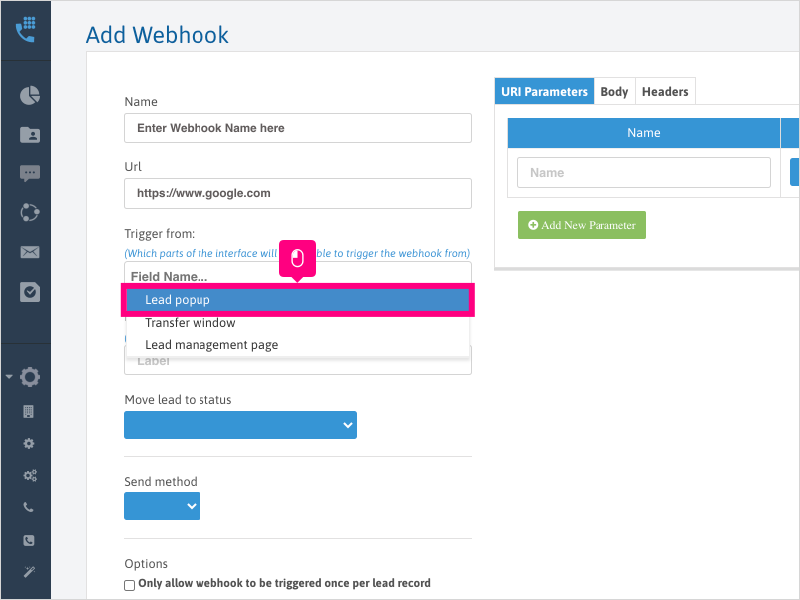
8. Click Transfer window if you want to trigger the webhook from the Call Transfer window (while on an active call).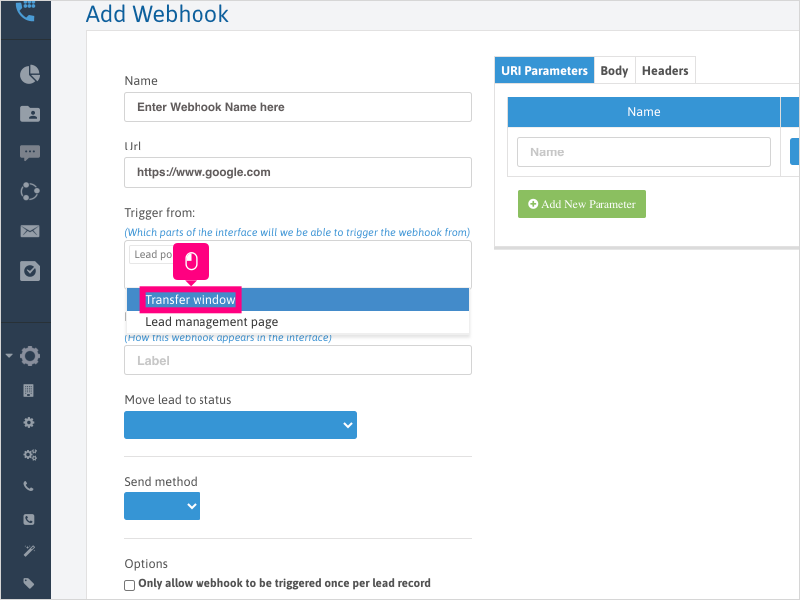
9. Click Lead management page if you want to trigger the webhook from the Lead Details page of a lead.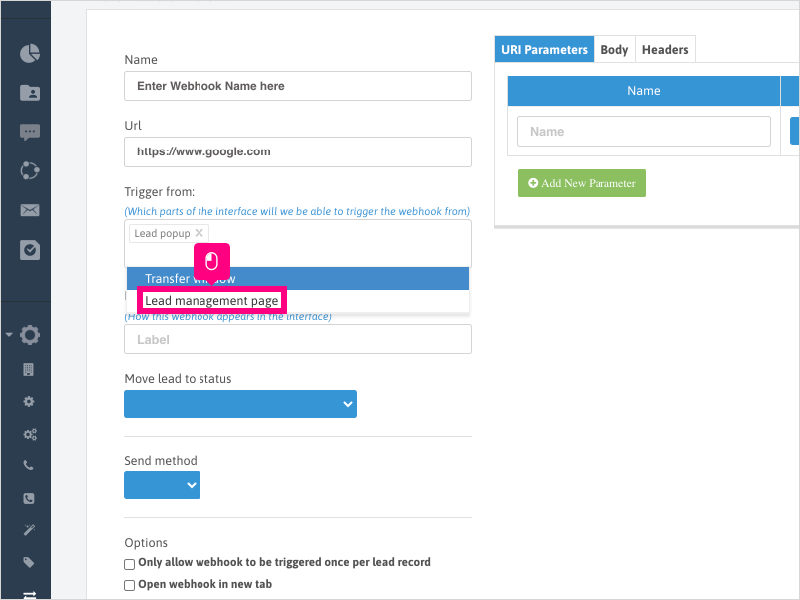
10. Click inside the Label area to enter the label that will be displayed on the webhook button.
11. Click the Move lead to status dropdown if you want to change the leads' status when this webhook is triggered.
12. Click the Send method dropdown to choose the method of delivery to the URL above.
NOTE: You may need to consult with your 3rd party application docs on the proper Send method to enter.
13. For this example, we will select post.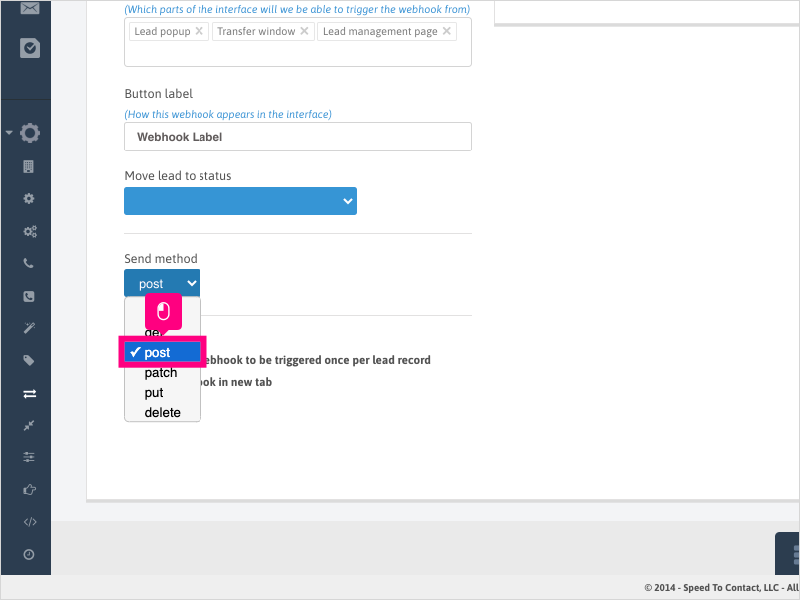
14. Click this checkbox if you want this webhook to be triggered only once per lead.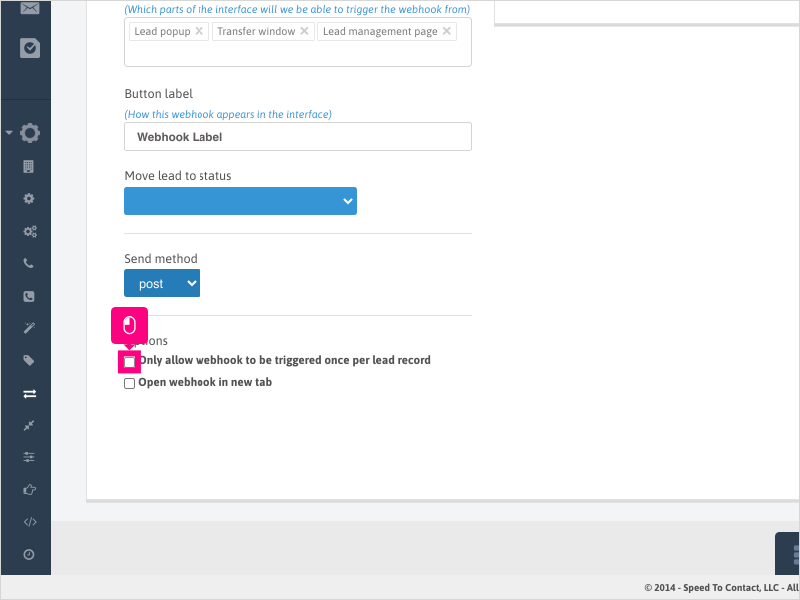
15. Click this checkbox if you want to open the webhook in a new tab when triggered.
16. On the URI Parameters tab, you can choose to send various data types to the URL as a query string or URI parameter.
NOTE: Please consult your 3rd party application docs for the proper variable type to send to the application's URL.
17. On the Data Type column, click the dropdown to display the different data types that you can choose from.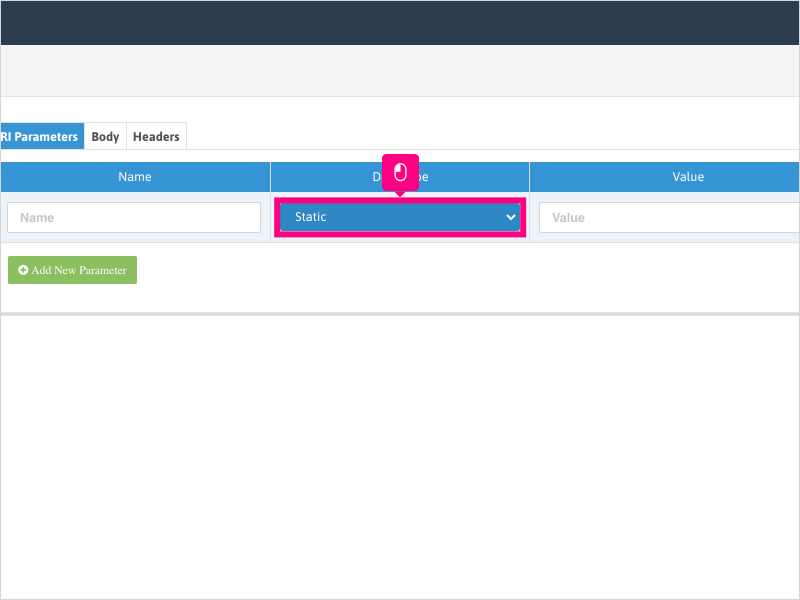
18. For this example, we will select Static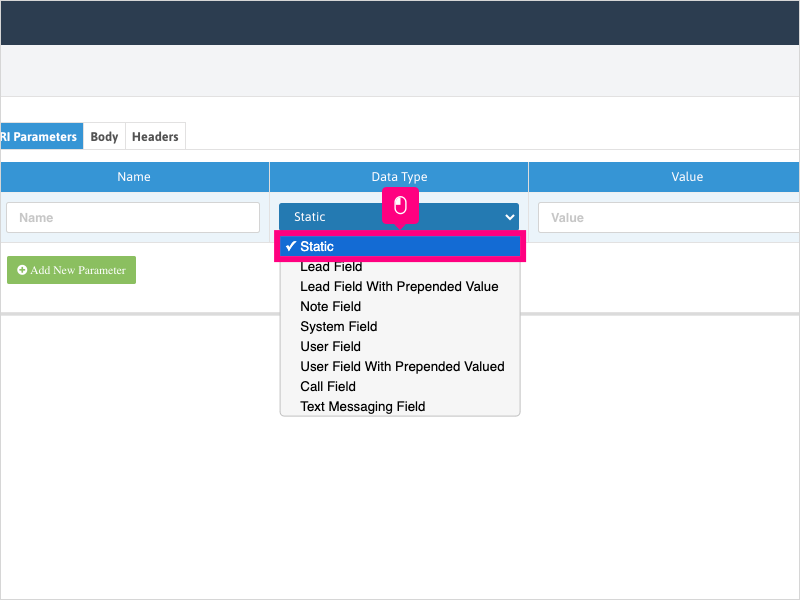
19. For Static data types, you will enter the name the 3rd party application understands in the Name area.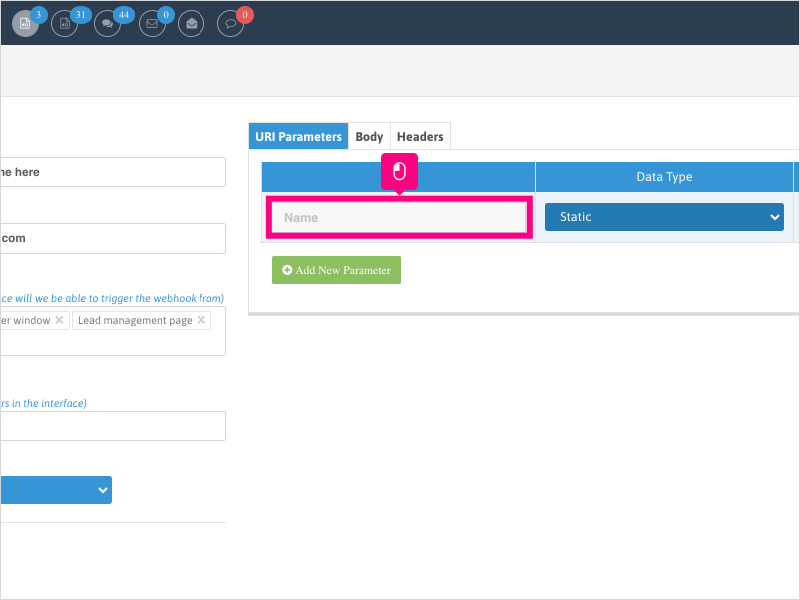
20. In the Value area, you'll type the static data value in this section.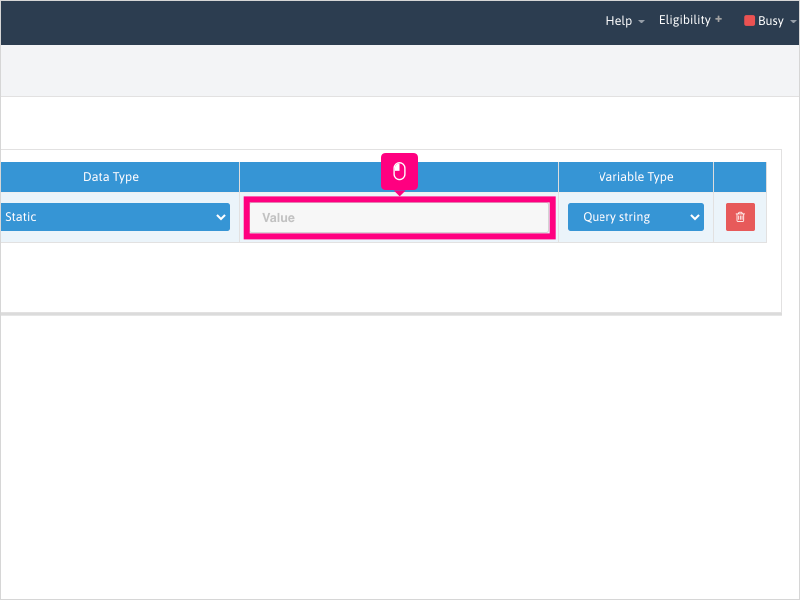
21. You can add multiple parameters to your webhook. If you need to add another parameter, click Add New Parameter
22. Click the dropdown under the Data Type column to choose the data type you want to send.
23. For this example, we will select Lead Field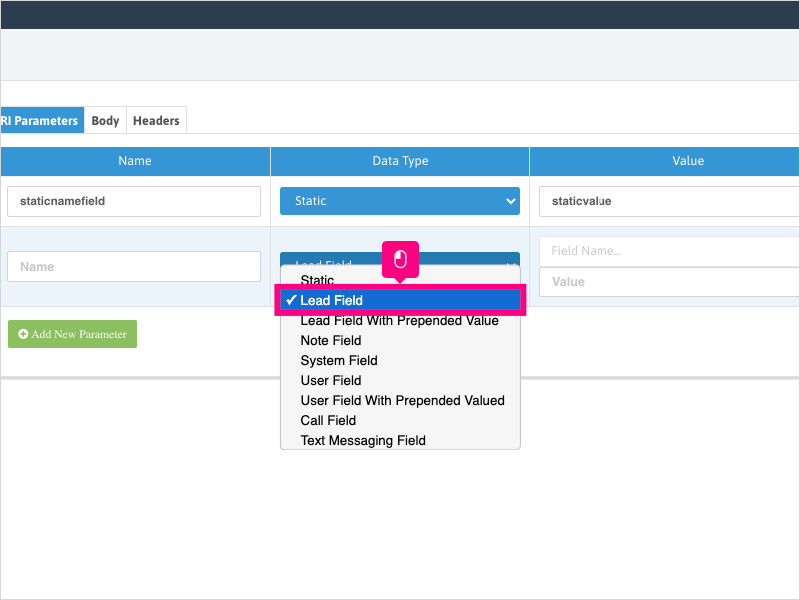
24. Click inside the Name area and enter the name the 3rd party application understands for the Lead Field you are going to send.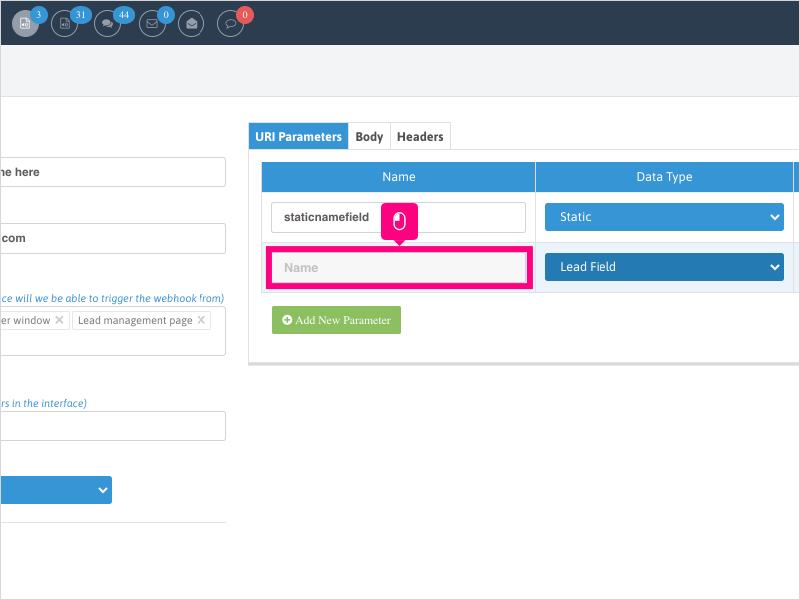
25. Click the dropdown for Field Name and choose your field name from Ricochet.
26. For this example, we will click First Name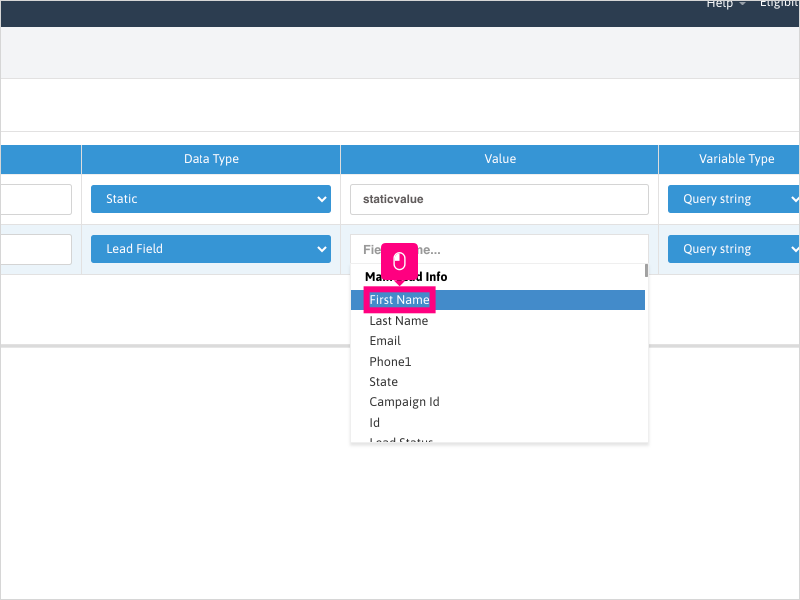
27. If you have more parameters to add, click Add New Parameter and follow steps 22 through 26.
Be sure to choose the correct Data Type from the dropdown and fill in the appropriate information in the Name, Value, and the Variable Type areas.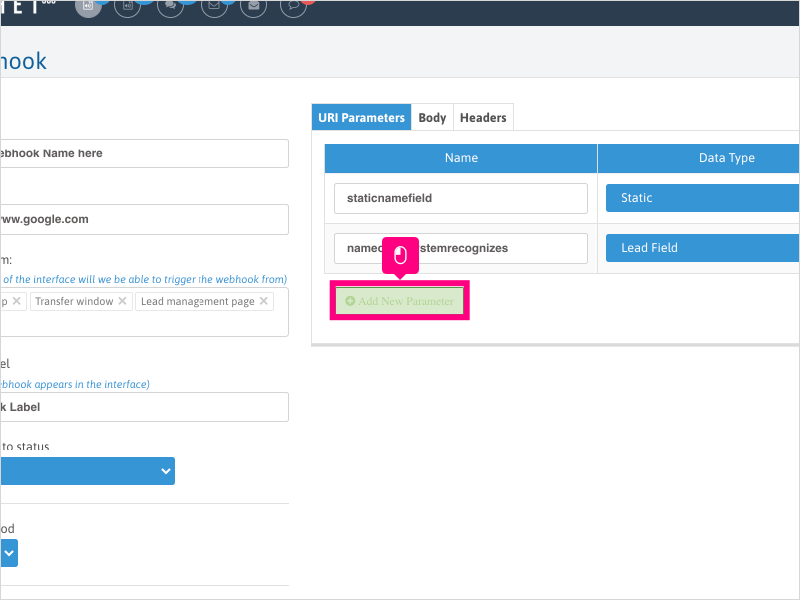
28. If you need to send data in the body of the post to the URL (instead of through the URL directly), click the Body tab.
NOTE: Please consult your 3rd party application docs for the proper formats that they can receive.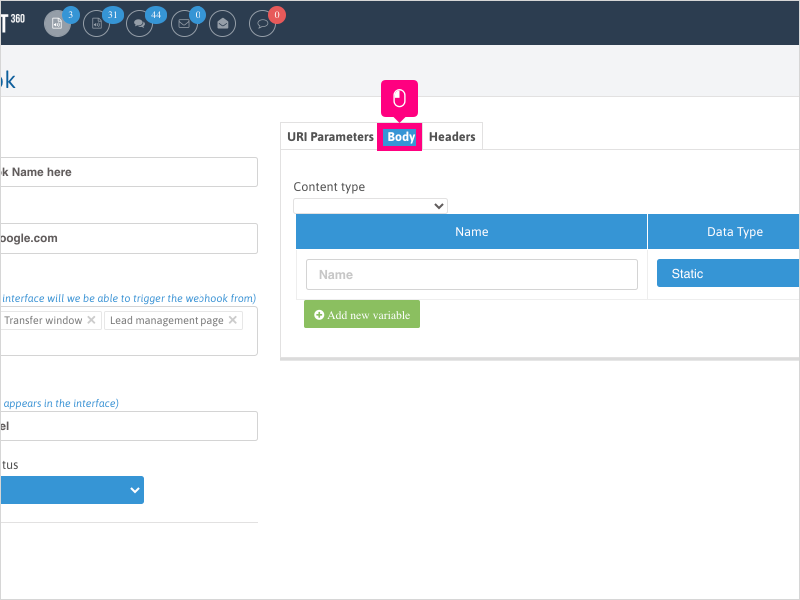
29. Click the dropdown under Content type and choose the type (format) of your post.
NOTE: Please consult your 3rd party application docs for the proper formats that they can receive.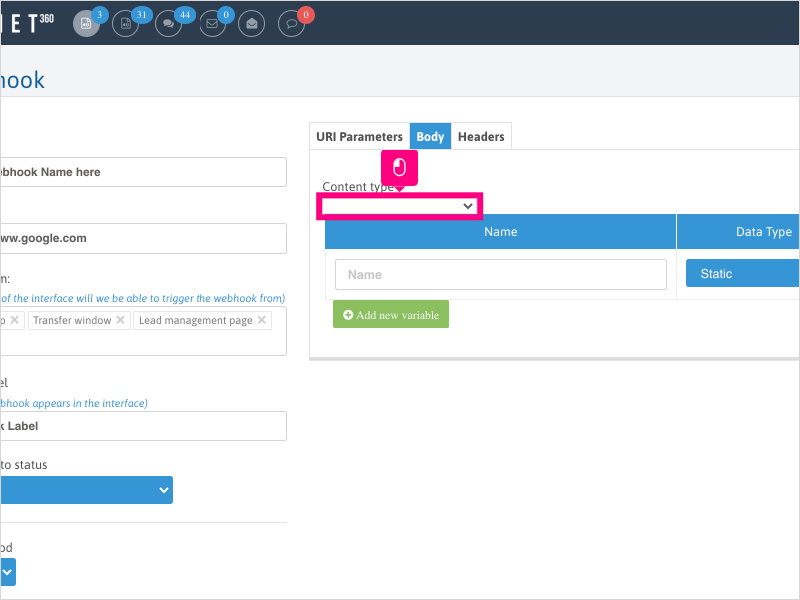
30. For this example, we will select application/json
NOTE: Please consult your 3rd party application docs for the proper formats that they can receive.
31. Follow steps 22 through 26 to add your data.
Click Headers if you need to add Headers to your post.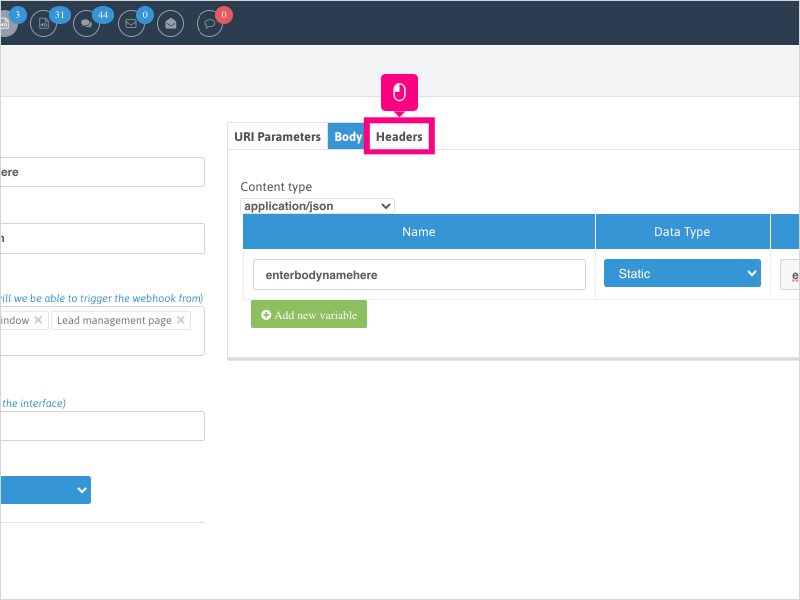
32. Follow steps 22 through 26 to add your data.
Click Save when finished. Ask users to refresh Ricochet to see the webhook in the locations selected.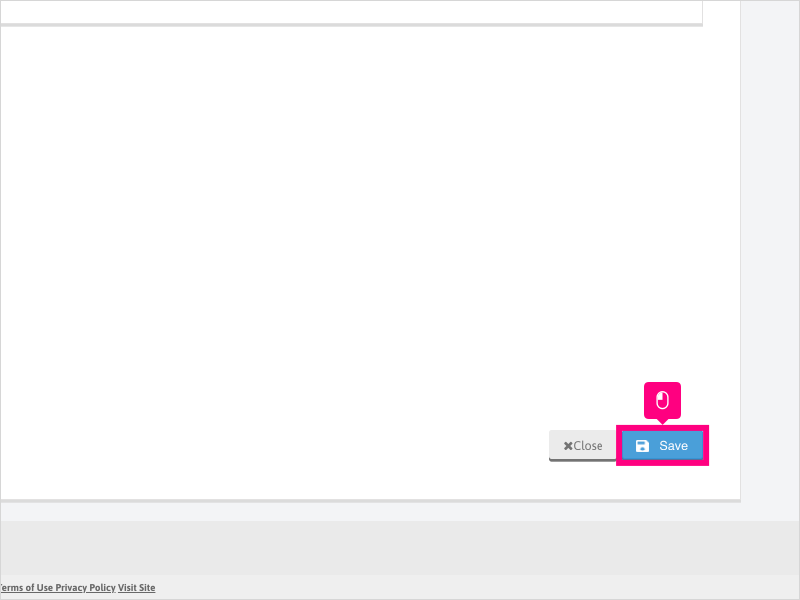
Was this article helpful?
That’s Great!
Thank you for your feedback
Sorry! We couldn't be helpful
Thank you for your feedback
Feedback sent
We appreciate your effort and will try to fix the article