Subject
Applies to: Admin/Branch Manager
Purpose: How to edit fields on lead pop-up window
Location in Ricochet: Lead Management Page
Description
The instructions in this article require Branch Manager permission or above
These instructions explain how to customize the fields displayed on the Lead Pop-Up window in Ricochet by opening a lead from the Lead Management page, accessing the Lead Pop-Up via View Scripts, and using the Edit Fields option on the Lead Details tab. They describe how to add fields from the Lead Details page, search and select specific fields, reorder them by dragging, and remove fields from view without deleting the underlying data.
Resolution
Optional: View the interactive tutorial for this process:
Click here to open the step-by-step tutorial in a new tab
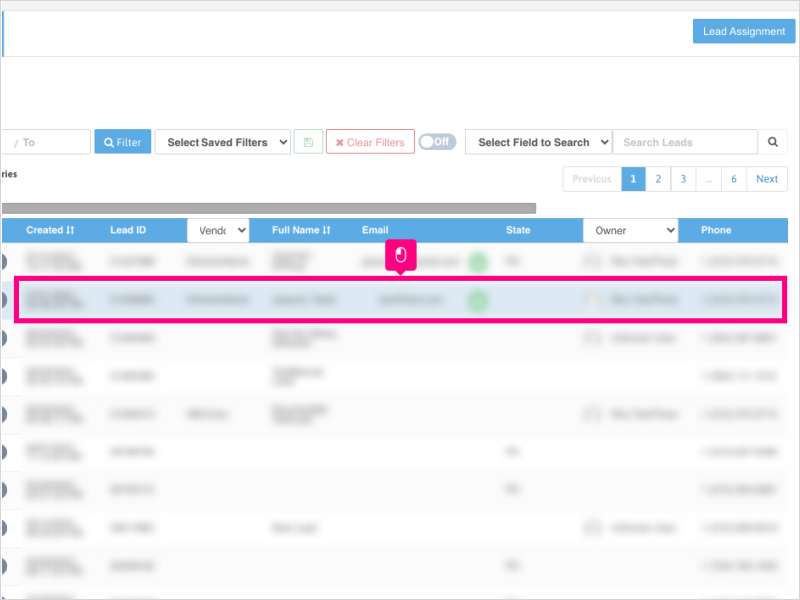
Non-Administrators do not have the access to follow these instructions and should open a ticket.1. To edit the fields on the Lead Pop-Up window, first, from the Lead Management Page, click on any lead to view the lead details page.
2. Click the View Scripts button to pull up the leads' Lead Pop-Up window.

3. Ensure you are on the "LEAD DETAILS" tab
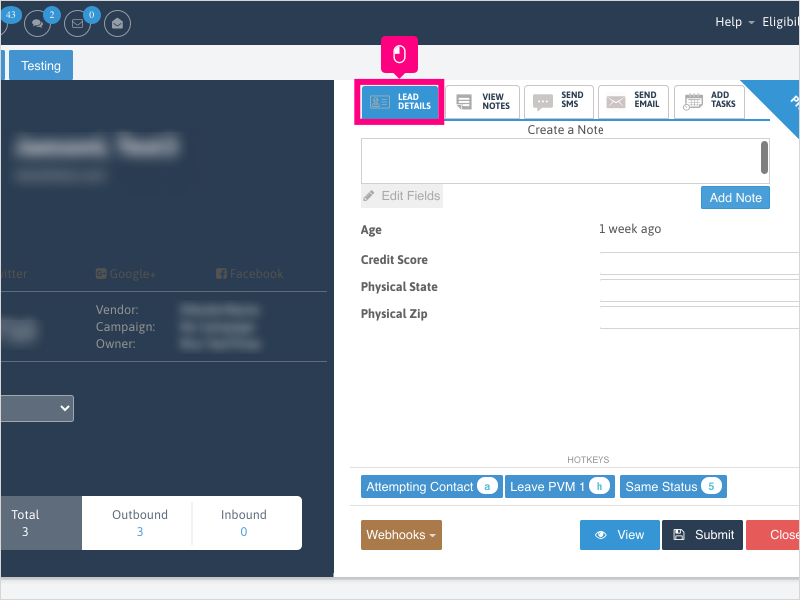
4. Click the "Edit Fields" button (located under the "Create a Note" section).

5. To add a field from your Lead Details page to the Lead Pop-Up window, click inside the area to reveal a dropdown list of fields.

6. Type inside the box the name of the field or scroll to the field (within the section) that you want to add.
For this example, we will type "Created" to search for the Created At field.
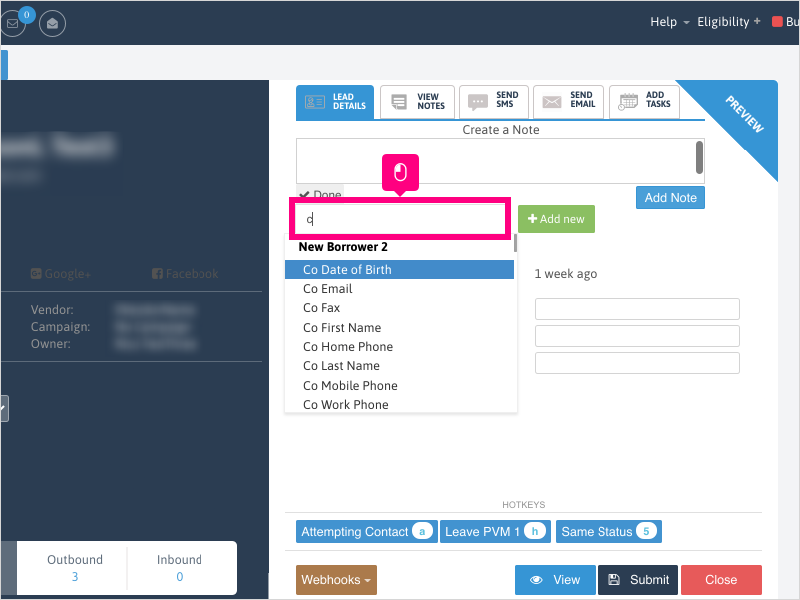
7. Click the field you want to add. For this example, we will select "created at".
Note that your system may vary from this example as to which section the field(s) are located in your Lead Details page.

8. After selecting the field, click the Add new button.

9. Repeat Steps 5 through 8 to add more fields to the Lead Pop-Up window.
Otherwise, continue to the next step.

10. If you wish to reorder the fields, click on the field name and drag it to the desired location on the Lead Pop-Up window.

11. If you wish to remove a field from the Lead Pop-Up window, click the red Delete button next to the field.
NOTE: This will NOT remove the field from the lead - it will only remove the field from view on the Lead Pop-Up window.

12. Once finished with all the updates to the Lead Pop-Up window, click Done.
Finally, once able to do so (i.e., not on an active phone call), all users should refresh their Ricochet browser for the changes to be reflected on their Ricochet platform.

Was this article helpful?
That’s Great!
Thank you for your feedback
Sorry! We couldn't be helpful
Thank you for your feedback
Feedback sent
We appreciate your effort and will try to fix the article