Subject
Applies to: Admin/Branch Manager
Purpose: To Upload Leads to Ricochet
Location in Ricochet: Configuration > Upload Leads Page
Description
The instructions in this article require Admin permission
These instructions explain how to import a list of leads by navigating to Configuration > Upload Leads, naming and describing the import, and configuring optional settings such as dates, tags, vendors, campaigns, referral partners, duplicate handling, and lead status behavior. They detail how to manage date and timestamp formats, update existing leads, assign branches, trigger automation, and control queue placement. The steps also cover uploading and validating a properly formatted CSV file, mapping spreadsheet fields to Ricochet fields, starting the import, and monitoring progress through the Import History Report to review results and access imported leads.
Resolution
Optional: View the interactive tutorial for this process:
Click here to open the step-by-step tutorial in a new tab
Non-Administrators do not have the access to follow these instructions and should open a ticket.1. To import a list of leads in Ricochet, click Configuration

2. Scroll down and click Load a List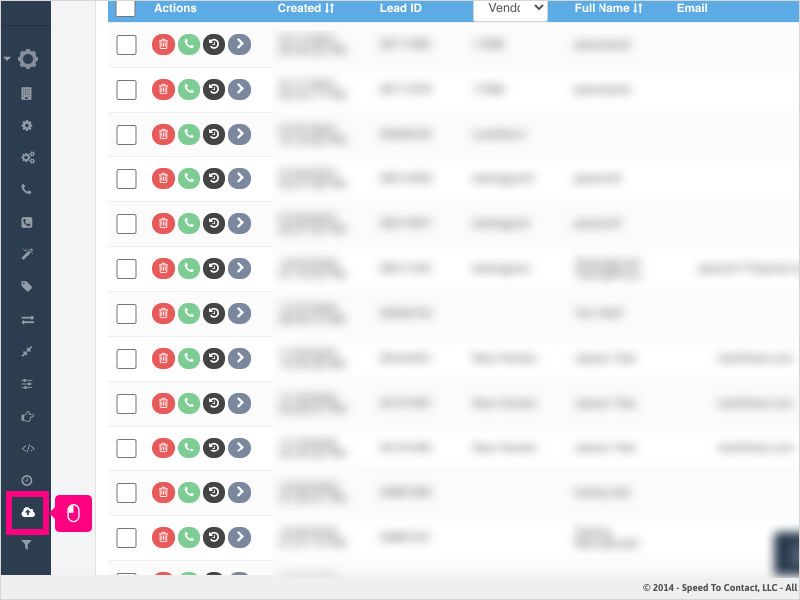
3. Click in the Name area and type a name for the list import.
NOTE: The name cannot be the same as a previous list import and cannot be blank.
4. Click in the Description area and type a description of the list being imported.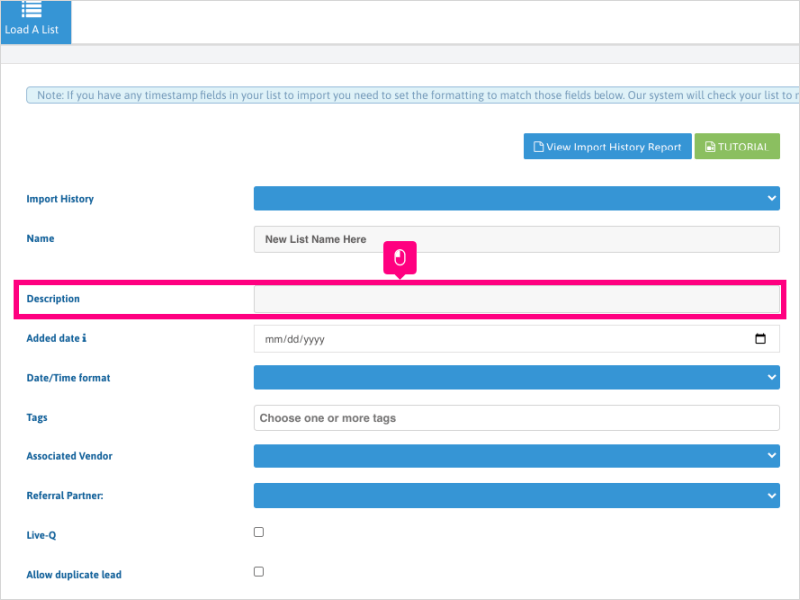
5. If you wish to add a date to the leads (back-dating or setting a specific date, click the calendar icon and select a date.
NOTE: By default - the current date will be used for the import.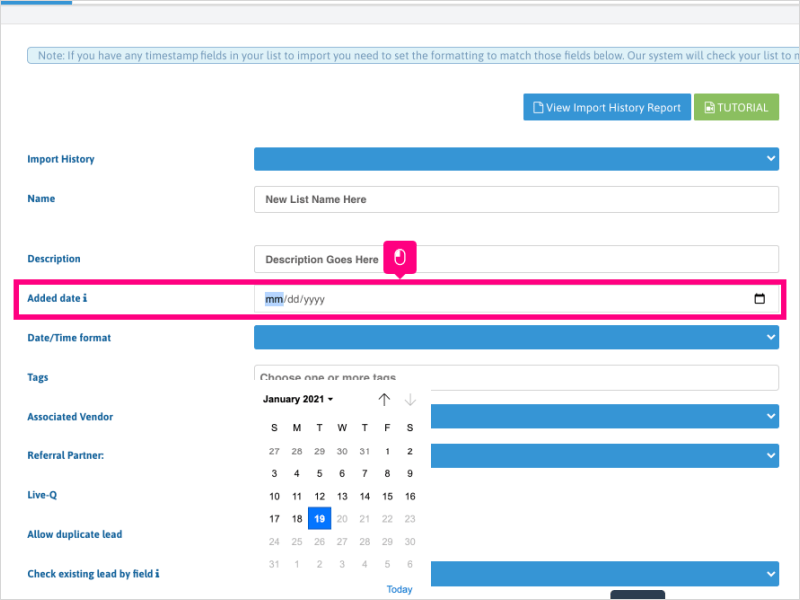
6. The Date/Time format dropdown lets you select a specific date/time format from a column on your spreadsheet. This is commonly used if you want to maintain the lead creation date for your data.
See the next step for more info on the Timestamp option
7. The Timestamp option is primarily for the rare cases when on the spreadsheet there is a date field as a unix timestamp, but it would also work in case there is the date in the standard format yyyy-mm-dd hh:mm:ss
Click the dropdown for Date/Time format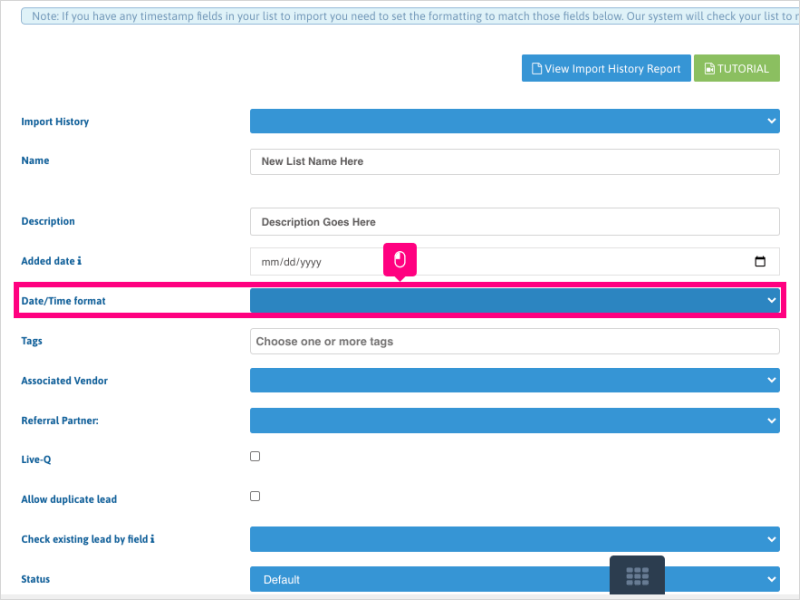
8. Select "Timestamp" if you want to use that option. Otherwise, click the dropdown and select "Date and Time"
9. If you choose "Date and Time", you'll need to select the date and time format that matches the date/time cell on your spreadsheet.
10. Confirm the Example matches what you have on your cell on your spreadsheet.
11. Click inside the Tags search area to select an existing tag to apply to the leads, or click New tag to create your own new tag for the list import.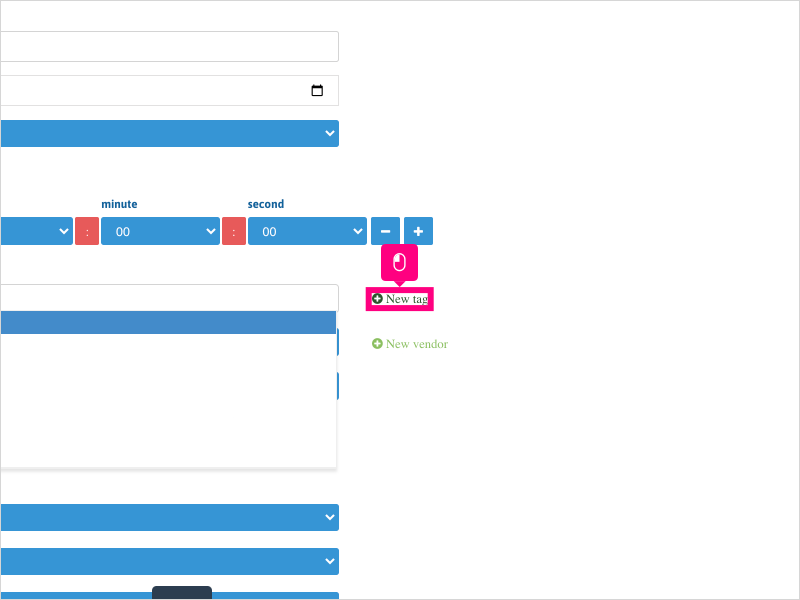
12. Click in the text area and type the name of the new tag.
Do not click "Close" after typing the name of the tag.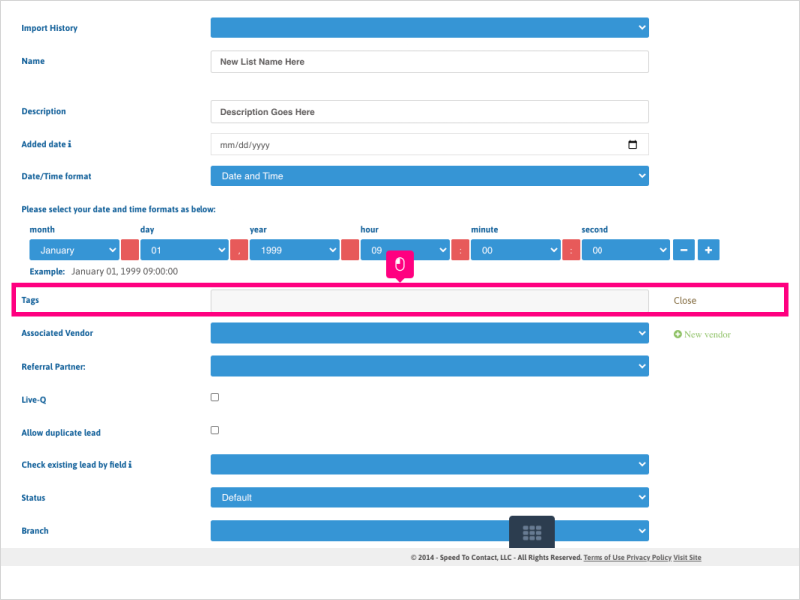
13. Select a vendor name from the dropdown or click New vendor to create a new vendor
14. Click in the text area and type the name of the new vendor.
Do not click "Close" after typing the name of the vendor.
15. If you are selecting an existing Vendor, you can click the dropdown for "Vendor Campaign" and choose an existing campaign for the vendor.
If you're creating a new Vendor and want to create a campaign, click New campaign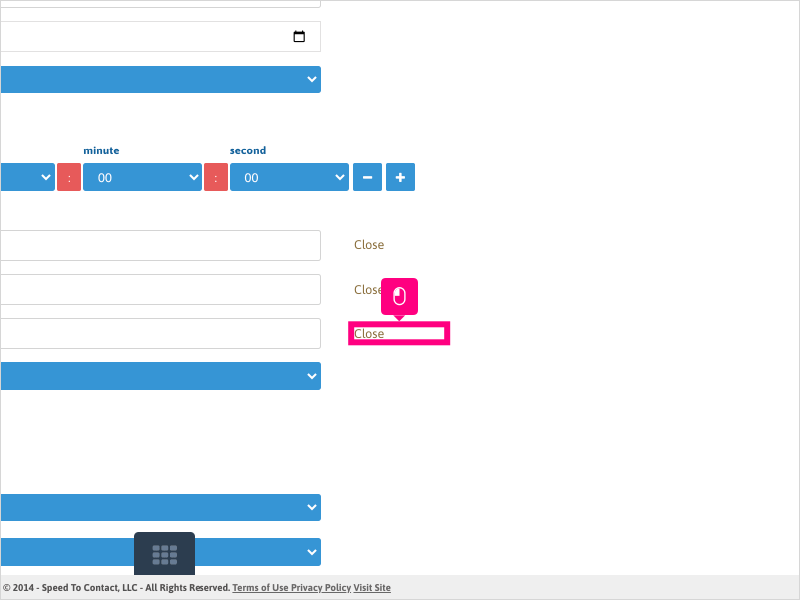
16. Click in the text area and type the name of the new vendor campaign.
Do not click "Close" after typing the name of the vendor campaign.
17. If you have Referral Partners set up, you can choose to associate the list import with one by selecting the Referral Partner from the dropdown.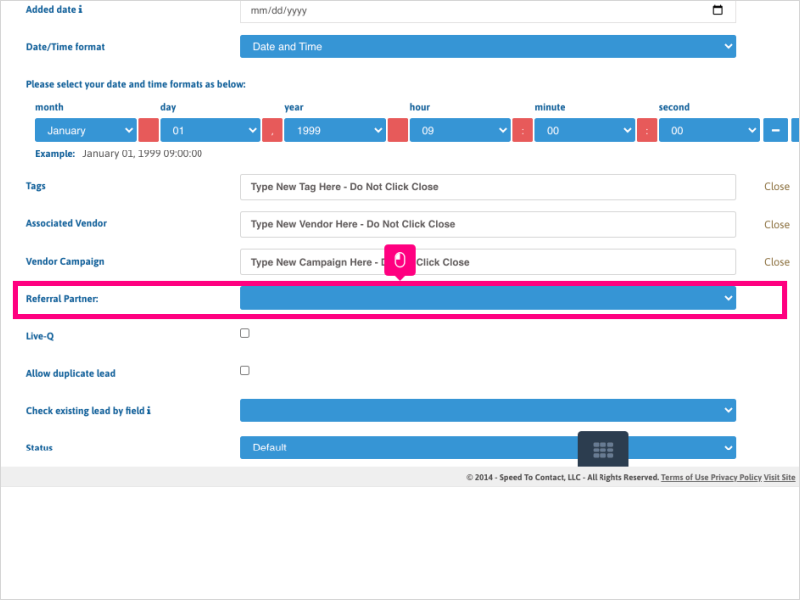
18. Click the checkbox for Live Q if you want to add the list import to the Live Q calling queue.
NOTE: Be very cautious with using this option as this will add all the leads ahead of your Cam Q and must be called first.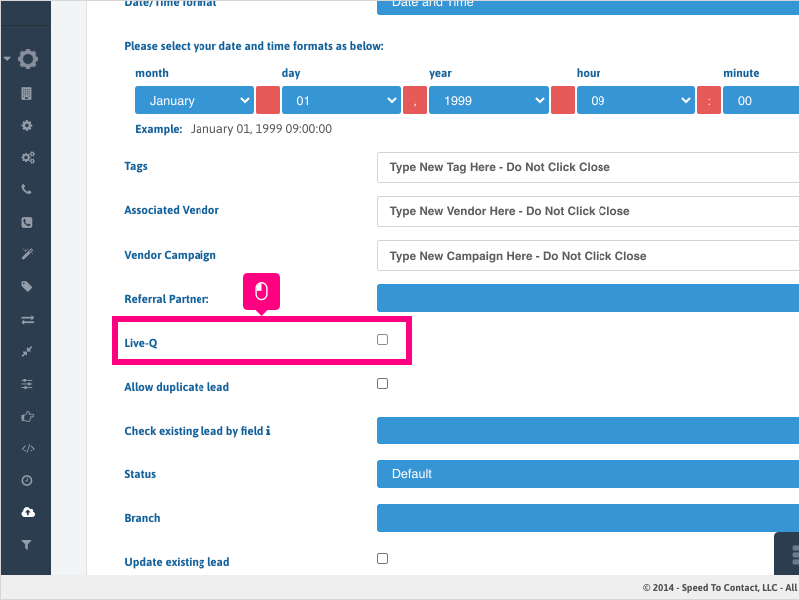
19. Click the checkbox for Allow Duplicate Lead if you want to permit duplicate leads to be added to your Ricochet platform (from the list import compared to your Ricochet database).
20. If you are updating existing leads in Ricochet, click the dropdown and select the field in Ricochet you want to match against from your spreadsheet.
NOTE: If a match is found in Ricochet, the lead will be updated, otherwise a new lead will be created.
21. Choose which status option you want to use for the list import:
-- Default - uses the default status
-- None - does not apply a status
-- Use Statuses in CSV file - uses statuses on list import spreadsheet Status column
-- Any other status in your list
22. Select from the dropdown a Branch, if you have more than one Branch.
If you leave this option blank, the list import will assign to the default main Branch.
23. Check the box for Updating existing lead if you are updating existing leads in Ricochet with lead data from the list import.
If no field is selected from the dropdown above, the default "check existing field" will be the main phone number.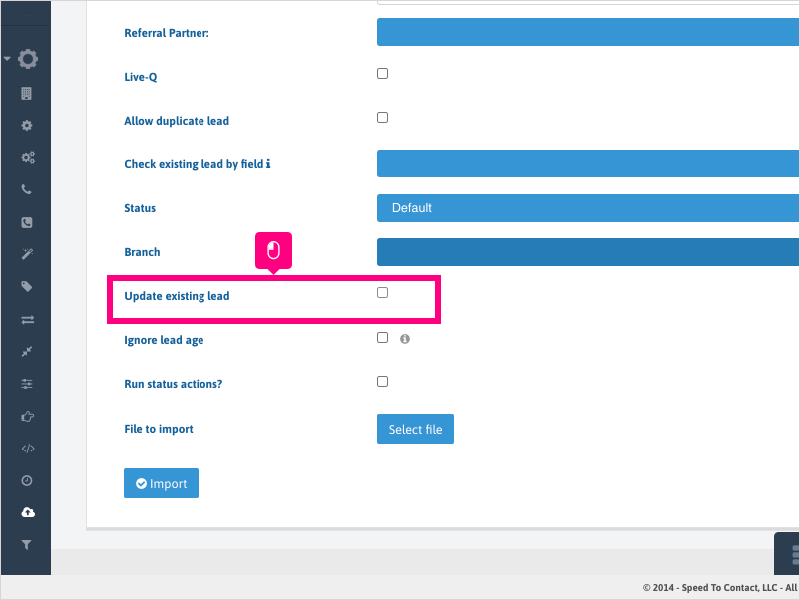
24. Check this box for Ignore lead age if you are updating any matching leads in the system and you want to ignore the lead age (looks at all leads).
Otherwise, lead updates will only be applied to leads created within the past 24 hours
25. Click this checkbox for Run status actions if you want to trigger any Marketing Automation (Text and/or Email) campaigns based on the status of the leads being imported.
26. Click the Select File box and upload your file. The file must:
-- Be in a CSV file format
-- Contain no blank columns or empty rows between data (will be added as a blank lead)
-- Contain header names for each column
-- Contain clean data to import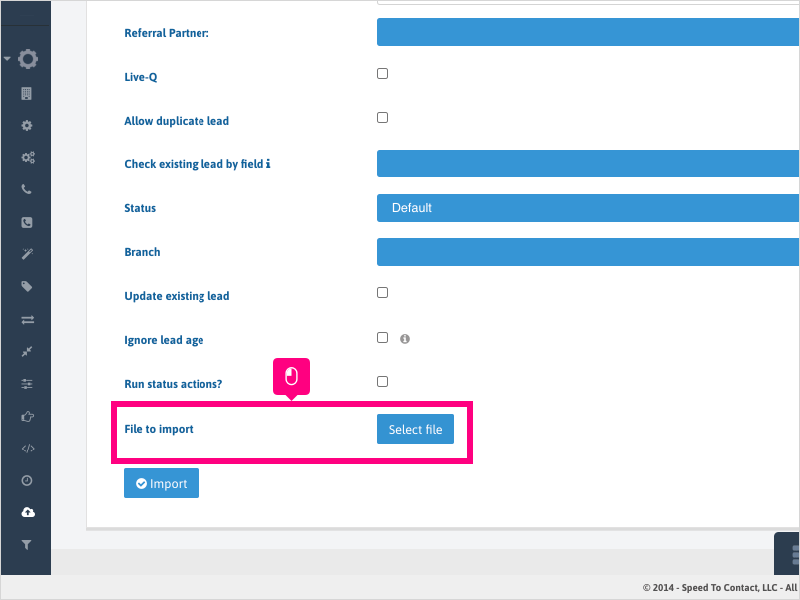
27. Click Import
28. If you are using Timestamp or Date/Timestamp dropdown, an overview will show up indicating where, if any, fields were found that match your selection.
If blank, click Go Back to make any necessary changes to the Date/Time filter options.
29. For this example, we will change the Date/Time format dropdown option to be blank (using current date for the lead import date).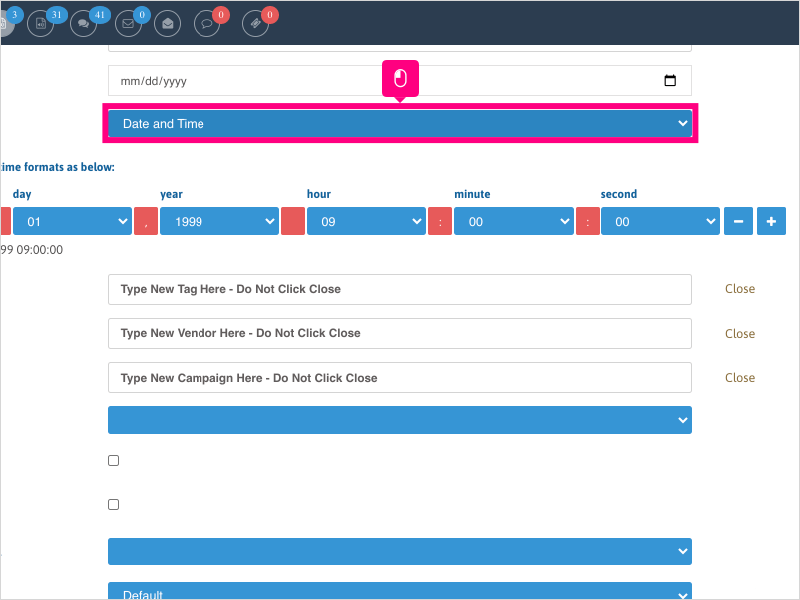
30. Select the blank area above the Timestamp and Date and Time options.
31. Scroll down and click Import to proceed to the field mapping page.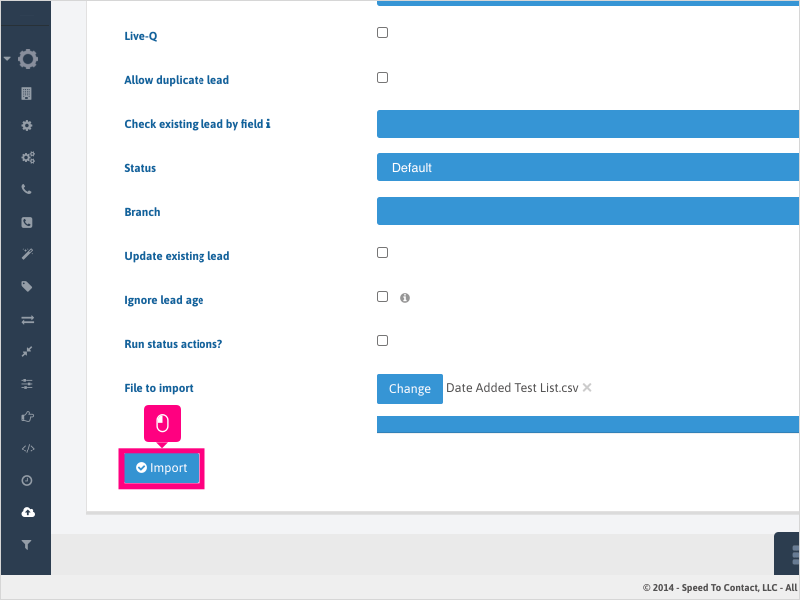
32. On this page, proceed to map your fields from the spreadsheet (left column) with a field in Ricochet (right column).
Click the dropdown for each field you want to map. If you want to omit a field, leave it blank and it will not import.
33. Once all the fields are selected, click Import to begin importing your list.
NOTE: On the right side are "Important Fields You May Want To Map". These are suggestions only and are not 100% required, but are highly recommended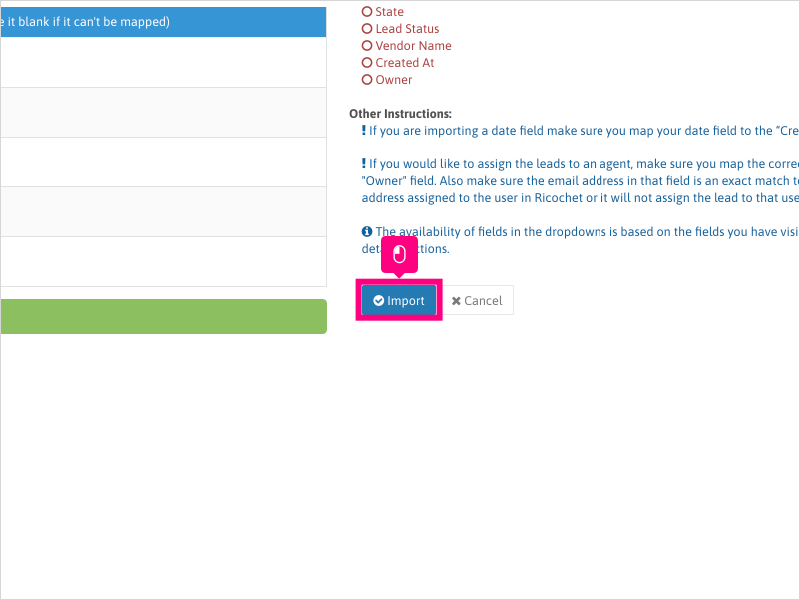
34. To check the status of your List Import, click View Import History Report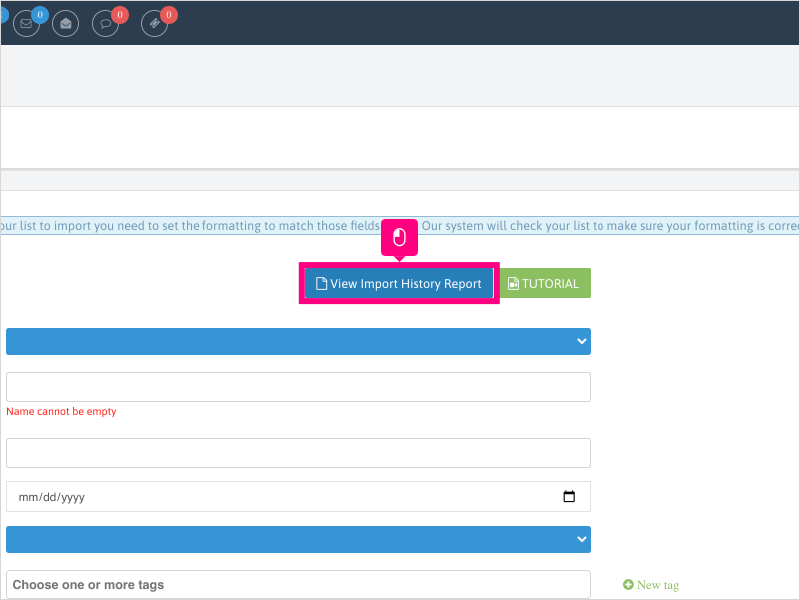
35. The "Status" column will give you the current status of the list import.
Some lead lists may have to run overnight - you'll be notified when importing your list if that is the case.
36. Click the View Leads icon if you want to view the leads for the list import
37. If the list import has not completed yet, the leads will not show up. If the leads are imported, they will show up in this page.
Click Close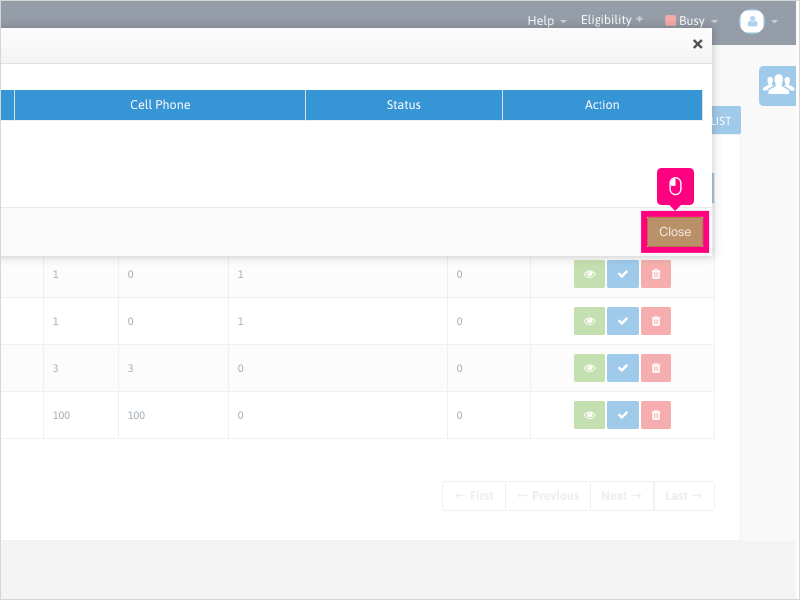
38. Click Back to LOAD A LIST to return to the Load a List page.
Was this article helpful?
That’s Great!
Thank you for your feedback
Sorry! We couldn't be helpful
Thank you for your feedback
Feedback sent
We appreciate your effort and will try to fix the article