Subject
Applies to: Admin/Branch Manager
Purpose: How to Set Up Scheduled Call Forwarding
Location in Ricochet: Configuration > Phone Settings
Description
The instructions in this article require Branch Manager access or above
These instructions describe how to set up Scheduled Call Forwarding for an Inbound IVR phone number by accessing Phone Settings, editing the IVR number, adding call forwarding rules with specific time ranges, failover actions, destination numbers, caller ID settings, applicable days, and repeating rules as needed before continuing with the remaining IVR routing configuration.
Resolution
Optional: View the step-by-step tutorial for this process:
Click here to open the step-by-step tutorial in a new tab
Non-Administrators do not have the access to follow these instructions and should open a ticket.1. To set up Scheduled Call Forwarding, click Configuration

2. Click Phone Settings
3. Click the IVR Phones tab
4. Click Edit for the Inbound IVR number you wish to edit.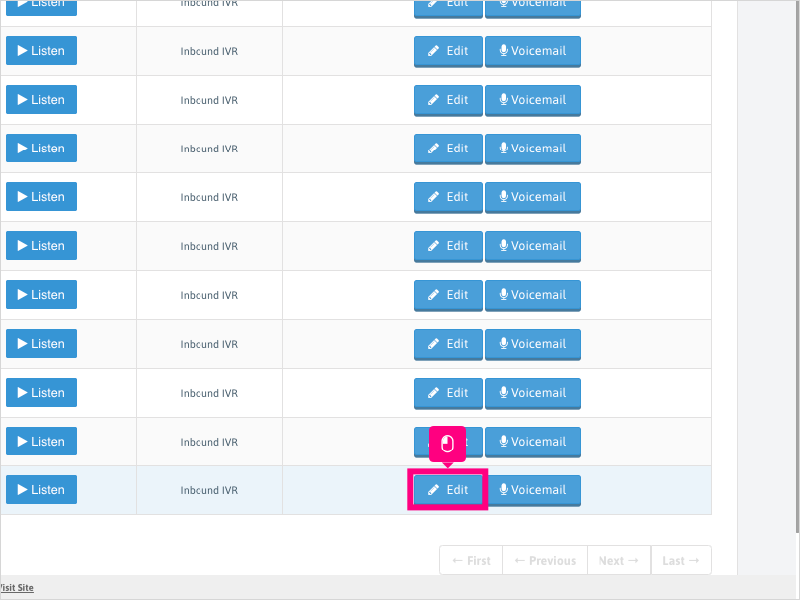
5. Click Routings tab and if the number is already configured for routing and you just want to add Call Forwarding rules, click Routing
Otherwise, click Greeting and start from the beginning with setting up your routing for your phone number.
6. Click Scheduled Call Forwarding
7. Click the + symbol to start your first Call Forwarding rule
8. Click the up/down arrows on the From and To times to adjust your call forwarding times.
The times selected are the times all calls to this Inbound IVR number will be forwarded.
9. Click AM/PM to get the correct time of day 
10. Enter your Transfer Timeout (in seconds). This is how long the system will attempt to ring the Failover Action before it terminates.
11. Click the dropdown for Failover and choose your Failover action desired during those hours selected.
12. For this example, we will select Dial a Number
13. Click inside the Number to be dialed area and type the phone number you wish to have called during the hours selected.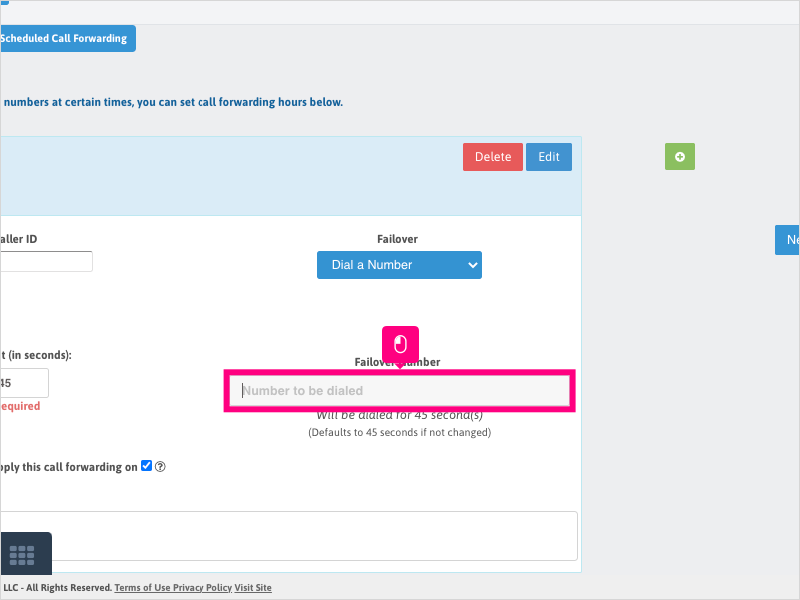
14. Click inside the Caller ID area and type the caller ID you wish to be displayed for the recipient of the call.
NOTE: You do not need to enter a number here - if none, the caller's caller ID will be used.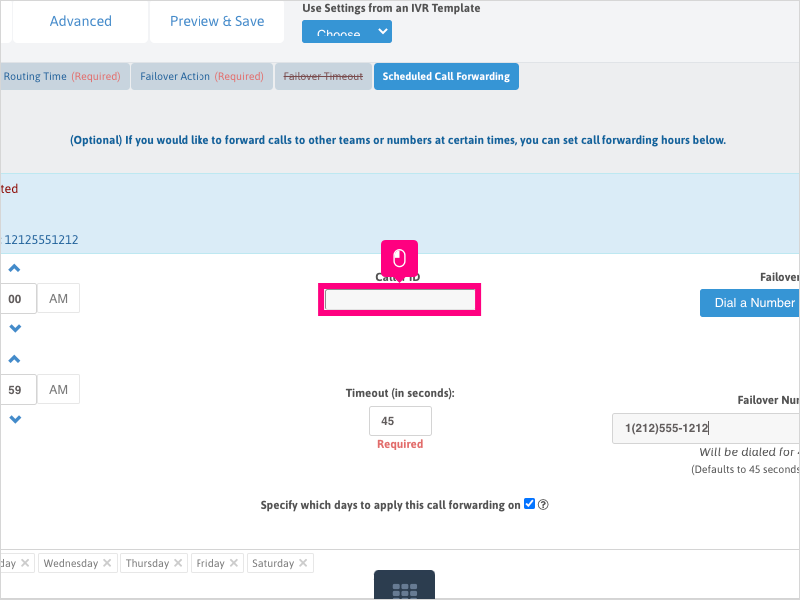
15. Scroll down and click X on the days you wish to remove from the "Apply call forwarding on" section (if desired).
NOTE: You can leave all or some of the days selected. If you uncheck the box, call forwarding will apply for every day of the week.
16. If you need to repeat this for additional call forwarding hours, you can do so by clicking the + symbol to start a new Call Forwarding rule.
Repeat Steps 8 - 15 if needed.
17. If you need to repeat this for additional call forwarding hours, you can do so by clicking the + symbol to start a new Call Forwarding rule.
Repeat Steps 8 - 15 if needed.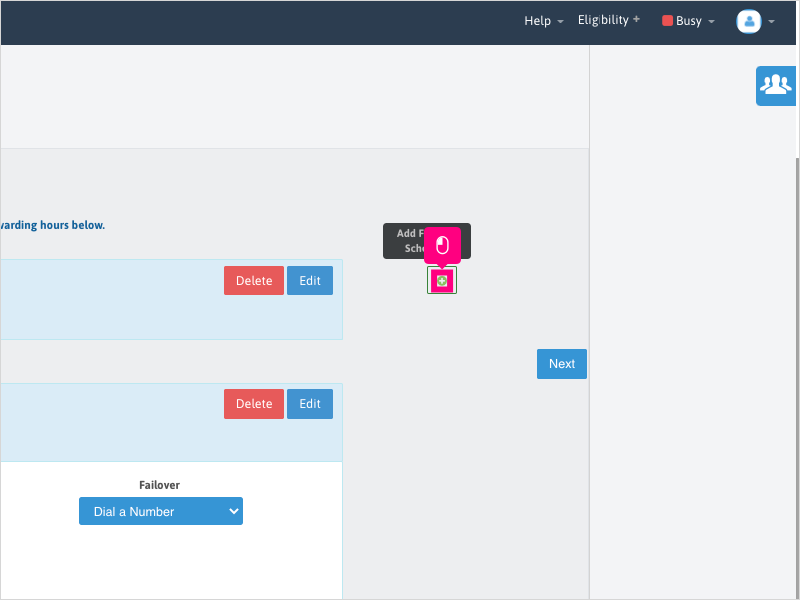
18. Once you finished adding your Call Forwarding rules, click Next to proceed with the rest of your Inbound IVR routing configuration.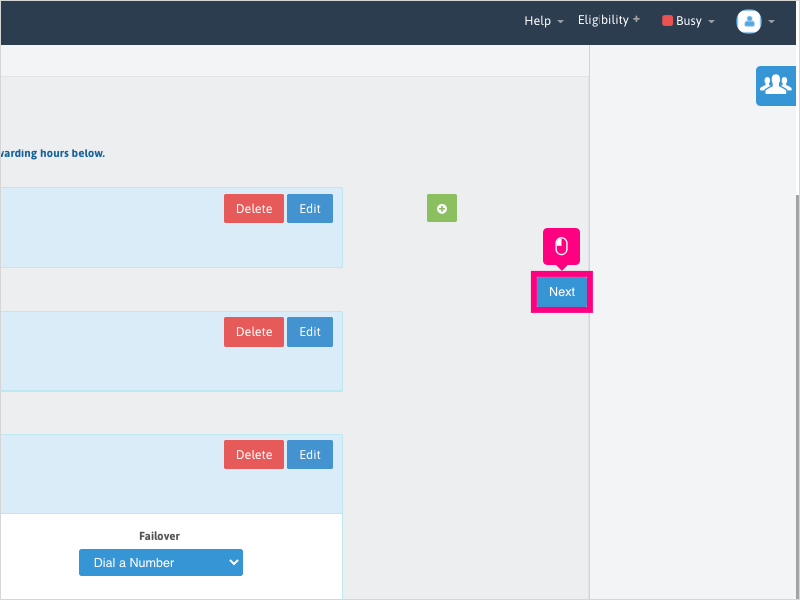
Was this article helpful?
That’s Great!
Thank you for your feedback
Sorry! We couldn't be helpful
Thank you for your feedback
Feedback sent
We appreciate your effort and will try to fix the article