Subject
Applies to: Admin/Branch Manager
Purpose: Understanding Advanced Options for IVR Phone Numbers
Location in Ricochet: Configuration > Phone Settings
Description
The instructions in this article require Branch Manager access or above
These instructions explain how to access and configure Advanced Options for an Inbound IVR phone number, covering call flow behavior, failover handling, agent contact routing, text-to-speech messages, caller ID usage, queue eligibility, notifications, licensing rules, hold music, warning tones, lead creation and campaign assignment, call waiting, call recording overrides, status-based routing, agent call acceptance requirements, and proceeding to complete the remaining IVR configuration.
Resolution
Optional: View the step-by-step tutorial for this process:
Click here to open the step-by-step tutorial in a new tab
Non-Administrators do not have the access to follow these instructions and should open a ticket.1. To access the Advanced Options for an Inbound IVR phone number, click Configuration

2. Click Phone Settings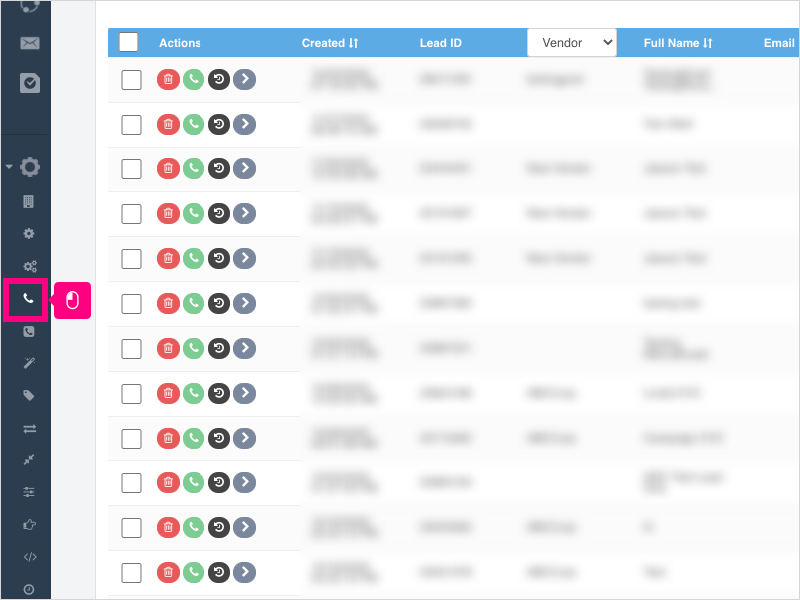
3. Click the IVR Phones tab
4. Click Edit for the Inbound IVR number you wish to edit.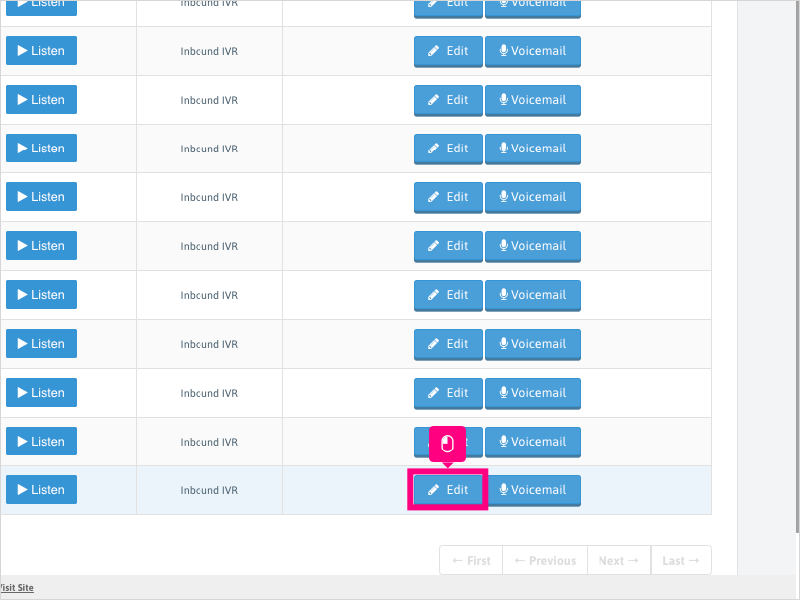
5. Click Routings tab and then Advanced
6. The first option is for Call Flow.
We recommend using the default setting of "Send callers directly to Failover if no users are available".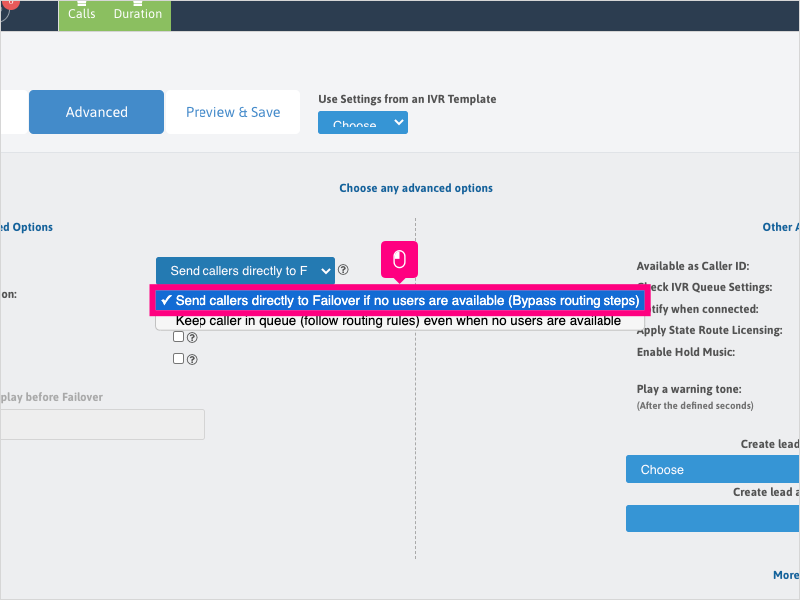
7. Click this checkbox to send callers to the Voicemail of this Inbound IVR after the Failover Action.
If left unchecked, the call will terminate after the Failover Action has been completed.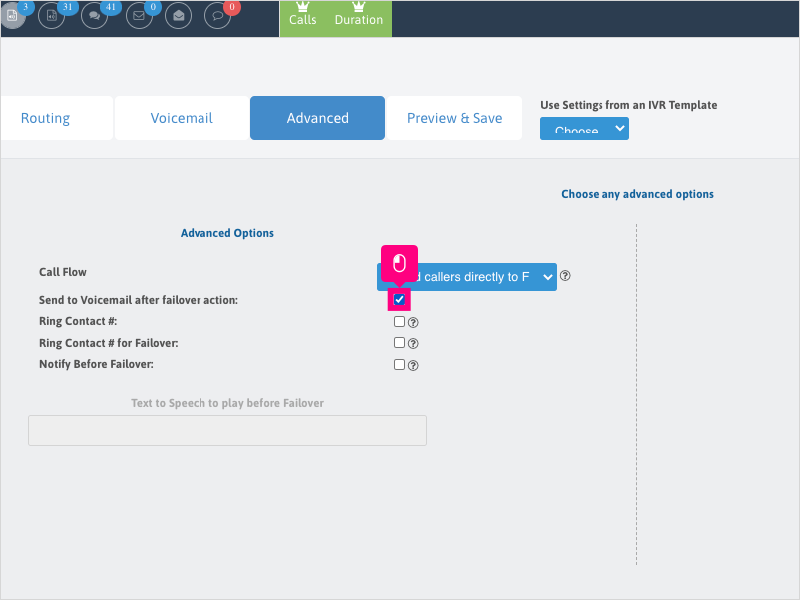
8. Click this checkbox if you wish to ring the Contact # found on the Agent's profile (found in Manage --> Agents).
NOTE: DO NOT add the agent's assigned number or any Ricochet phone number to the Agent's Contact # section. This will cause errors.
9. Click this checkbox if you wish to ring the Contact # during the Failover Action.
NOTE: This may be grayed out if "Transfer to #", "Transfer to IVR", or "End Call" is selected as the Failover Action.
10. Click this checkbox to open up the area below to type a Text to Speech message to be read to the caller before they go to the Failover Action.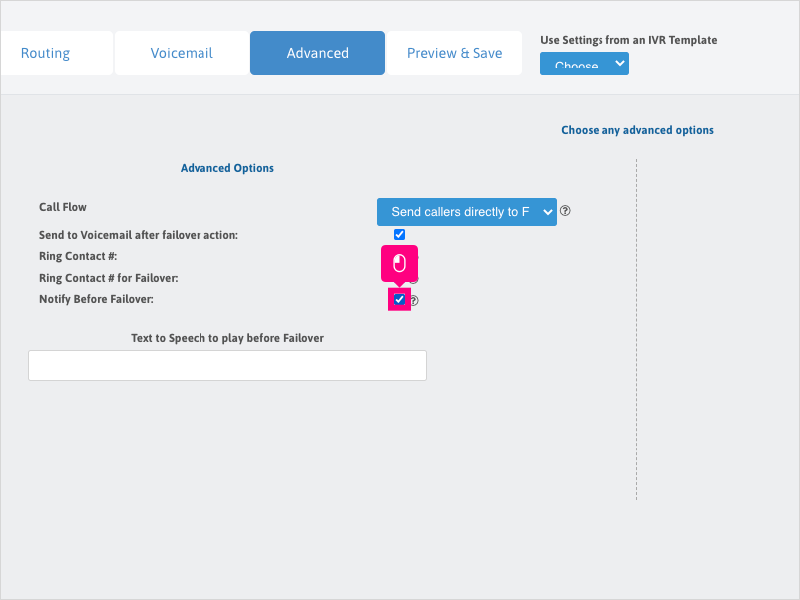
11. Click in the Text to Speech area and type your message to be read.
12. Click this checkbox to make this Inbound IVR number available as a caller ID (Local Caller ID / Local Presence).
NOTE: You can choose a Branch from the dropdown below or leave blank to use your main/default Branch.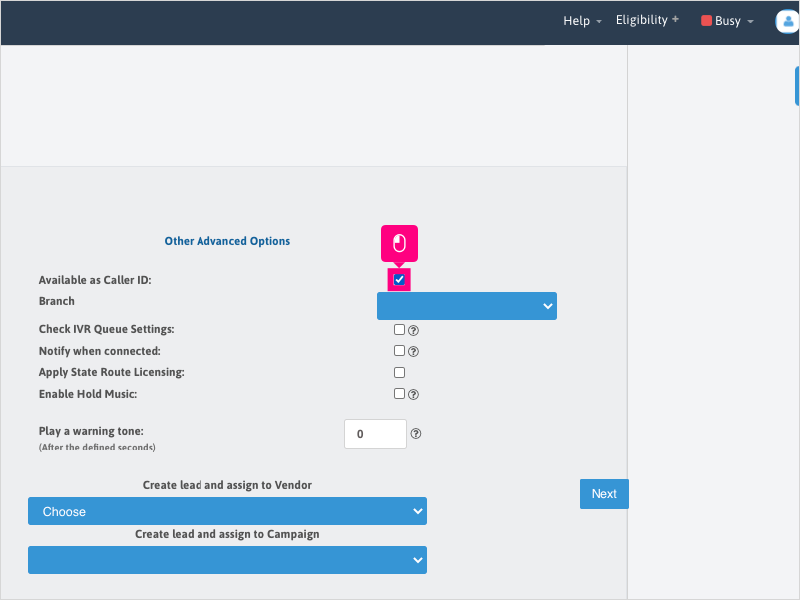
13. Click this checkbox to check the Agent's Inbound IVR queue eligibility before sending the call to the Agent(s).
To set eligibility, open the Team Member sidebar, click the down arrow for the user, click "Inbound IVR" blue/white to enable for the queue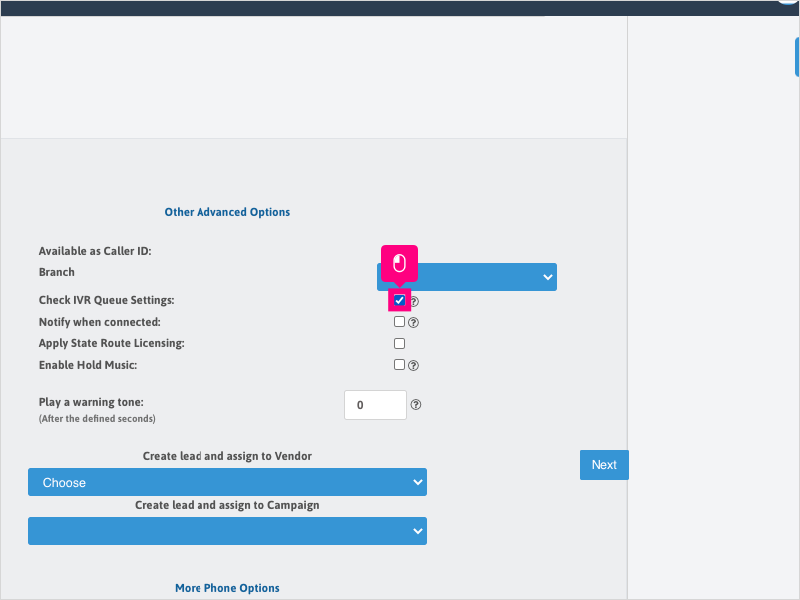
14. Click this checkbox to notify both the caller and Agent that they are connected to the call.
This setting is not widely used since we have a visual "Connected" message that displays on the screen when the Agent is connected to the call.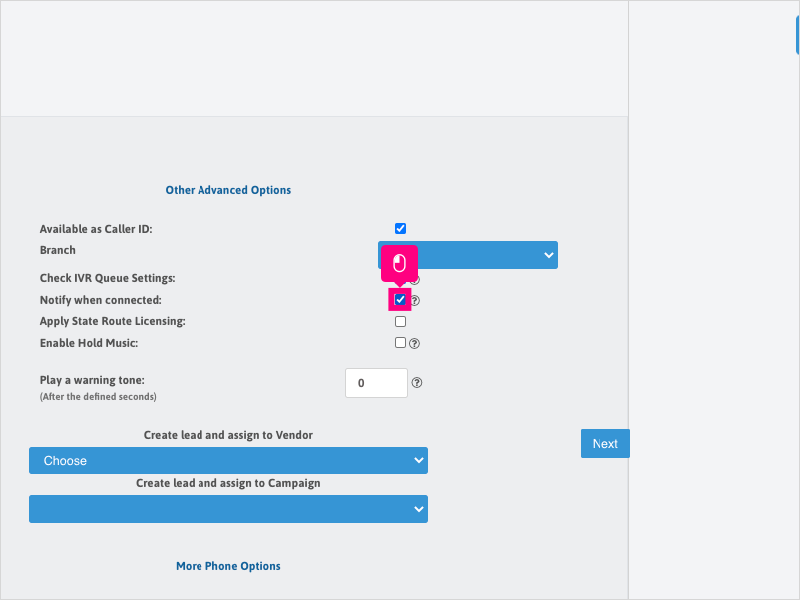
15. Click this checkbox to apply state route licensing to this Inbound IVR phone number.
Calls made to this number will only route to the user(s) that are eligible based on the State(s) selected in their profile (in Manage --> Agents).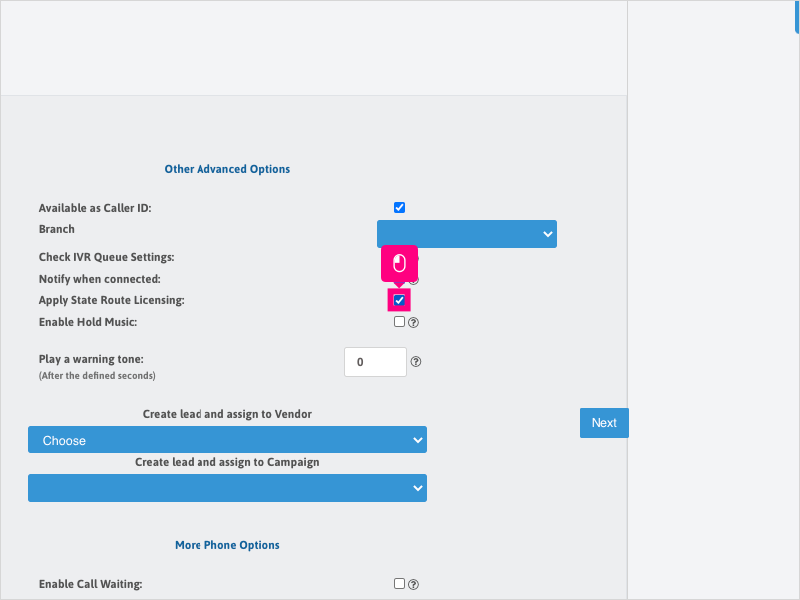
16. Click this checkbox to enable default Hold Music when connecting the caller to an Agent in your routing of this Inbound IVR phone number.
NOTE: This music is not editable or changeable.
17. Change the time, in seconds, in this area to play a warning tone to agents that there is an Inbound IVR call that has not been picked up. Leave set to zero to disable.
NOTE: You can enable the warning tone in each agent's profile in Manage --> Agents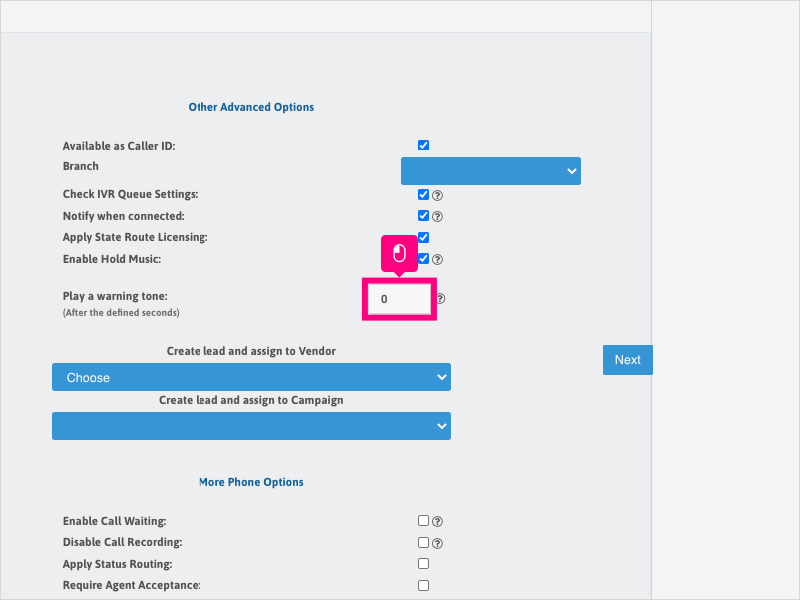
18. Click this dropdown menu if you want to create a new lead when the Inbound IVR call comes in.
If a lead already exists with the same phone number, a new lead will not be created.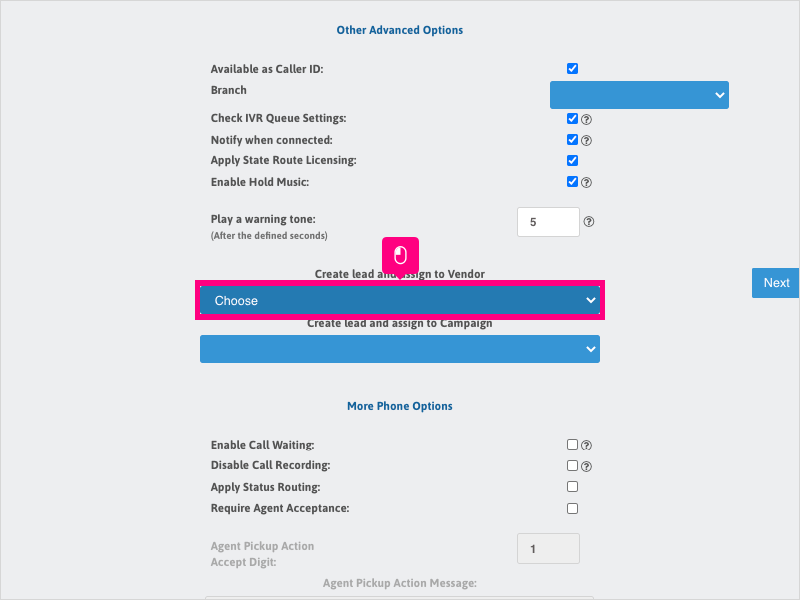
19. Click this dropdown menu if you want to select a campaign to also be added to the lead that gets created based on the Inbound IVR call.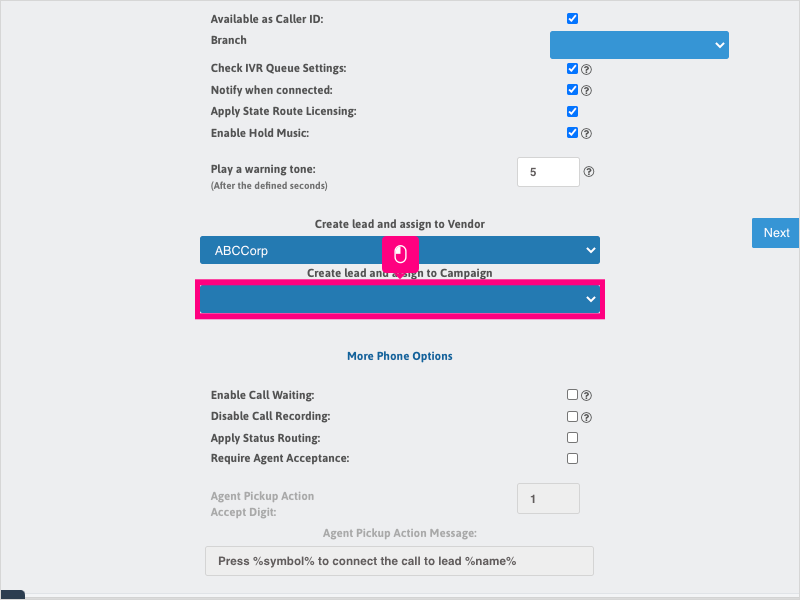
20. Click this checkbox if you want to enable Call Waiting on this Inbound IVR line.
With this enabled, eligible Agents who are in an "On Phone" status will see a Call Overview dialog box appear with options to accept or decline the Call Waiting call.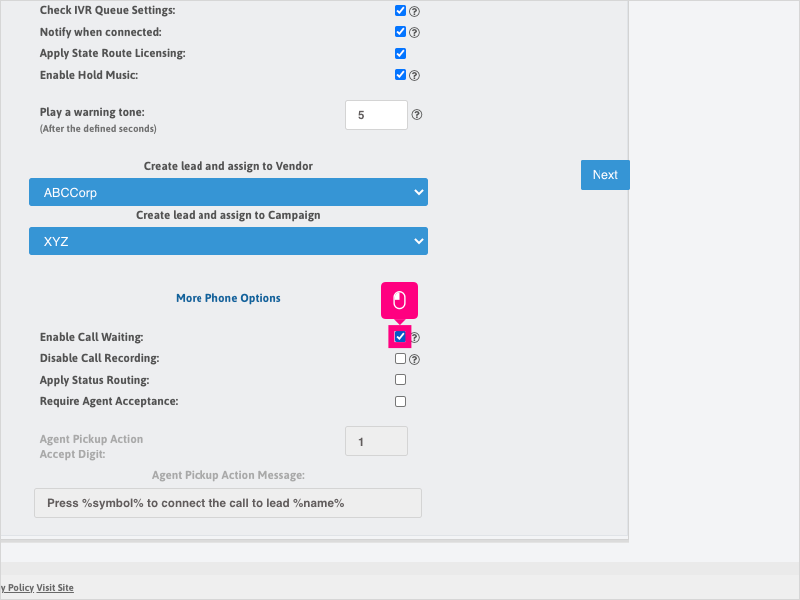
21. Click this checkbox to disable all call recordings for this Inbound IVR phone number for all calls made to the number.
This overrides any Call Recording settings in any other area of Ricochet.
22. Click this checkbox to apply status routing to this Inbound IVR number.
You can create an IVR template and apply the template to a status in Status Management - when calls from a lead in said status call in, they can follow different routing rules.
23. Click this checkbox to require the Agent to press a digit on the keypad to accept the incoming call.
There can also be a message customized and read to the agent to hear prior to pressing the digit.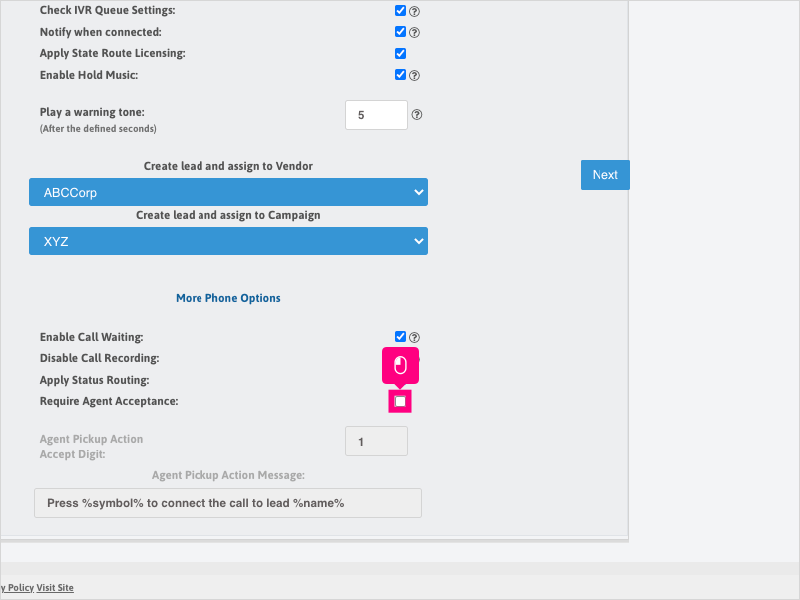
24. Once completed, you can click Next to proceed with the rest of the Inbound IVR configuration process.
Was this article helpful?
That’s Great!
Thank you for your feedback
Sorry! We couldn't be helpful
Thank you for your feedback
Feedback sent
We appreciate your effort and will try to fix the article