Subject
Applies to: Admin
Purpose: Creating New Tags
Location in Ricochet: Configuration > Distribution & Tags
Description
The instructions in this article require Administrator permission
These instructions describe how to create a new Tag in Ricochet, either restricted or unrestricted. Restricted tags can be limited to specific users or teams by enabling the “Restricted” option and selecting the desired user or team, while unrestricted tags are available to all users by default. After naming the tag and setting any restrictions, the tag is created and saved for use in lead management and automation workflows.
Resolution
Optional: View the interactive tutorial for this process:
Click here to open the step-by-step tutorial in a new tab
Non-Administrators do not have the access to follow these instructions and should open a ticket.1. To create a new Tag, click Configuration

2. Click Distribution & Tags
3. Click Tags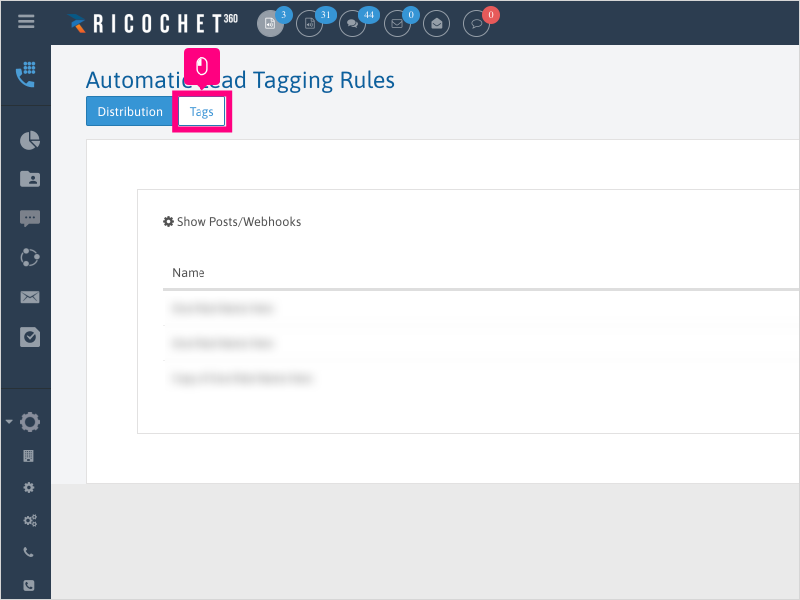
4. First we'll demonstrate how to create a Restricted Tag. If you want to create an unrestricted tag, skip to Step 13.
Click Create New Tag
5. Click inside the Tag Name area and give the tag a name.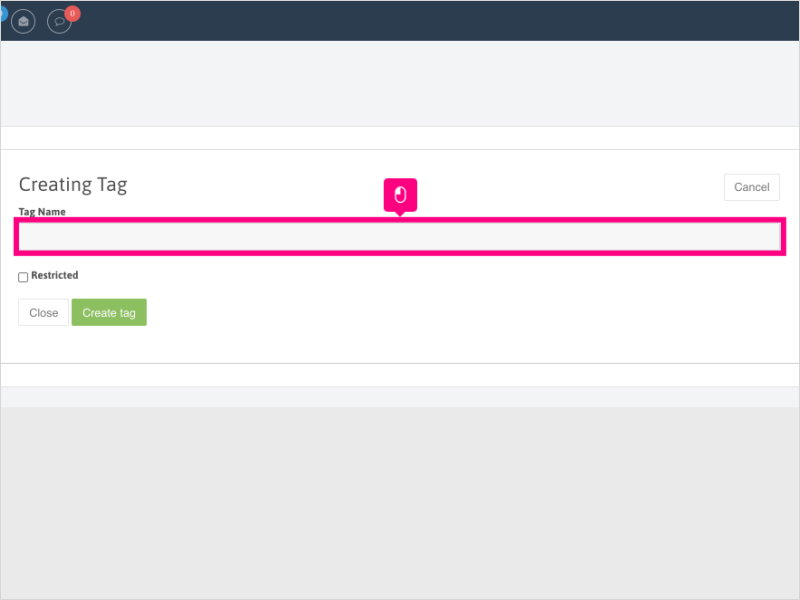
6. If you want to restrict the tag to certain users or a team, click Restricted
7. For this example, we will choose to restrict by team.
Click the By User dropdown.
8. Select By Team
9. Click the dropdown for "Select team".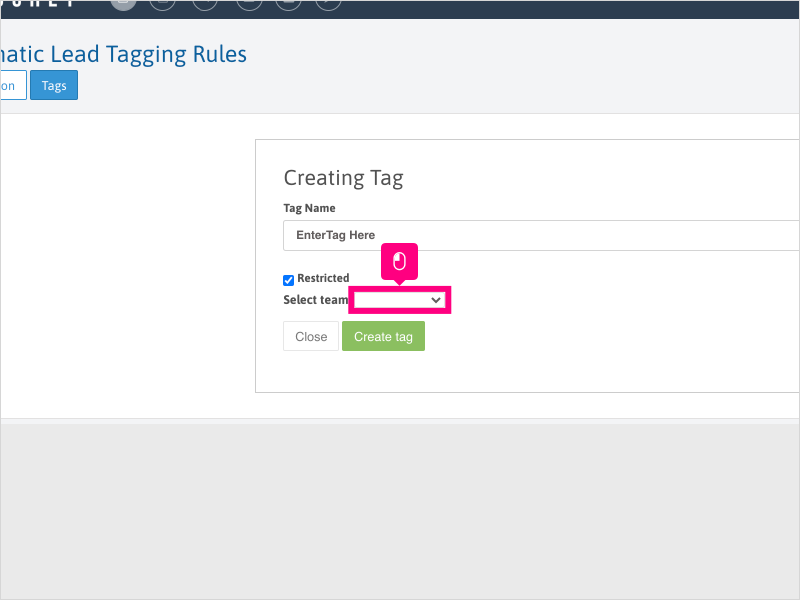
10. For this example, we will select Sales Team
11. Click Create tag
12. Click Close
13. If you want to create an unrestricted tag, click Create New Tag
14. Click inside the Tag Name area and type the name of the new tag.
15. Click Create tag
16. Click Close
Was this article helpful?
That’s Great!
Thank you for your feedback
Sorry! We couldn't be helpful
Thank you for your feedback
Feedback sent
We appreciate your effort and will try to fix the article